Select the device model to install eSIM
- Apple iPhone
- Android
Select the installation method
- Manual
- QR Code
- Link
Step 1.Install eSIM
-
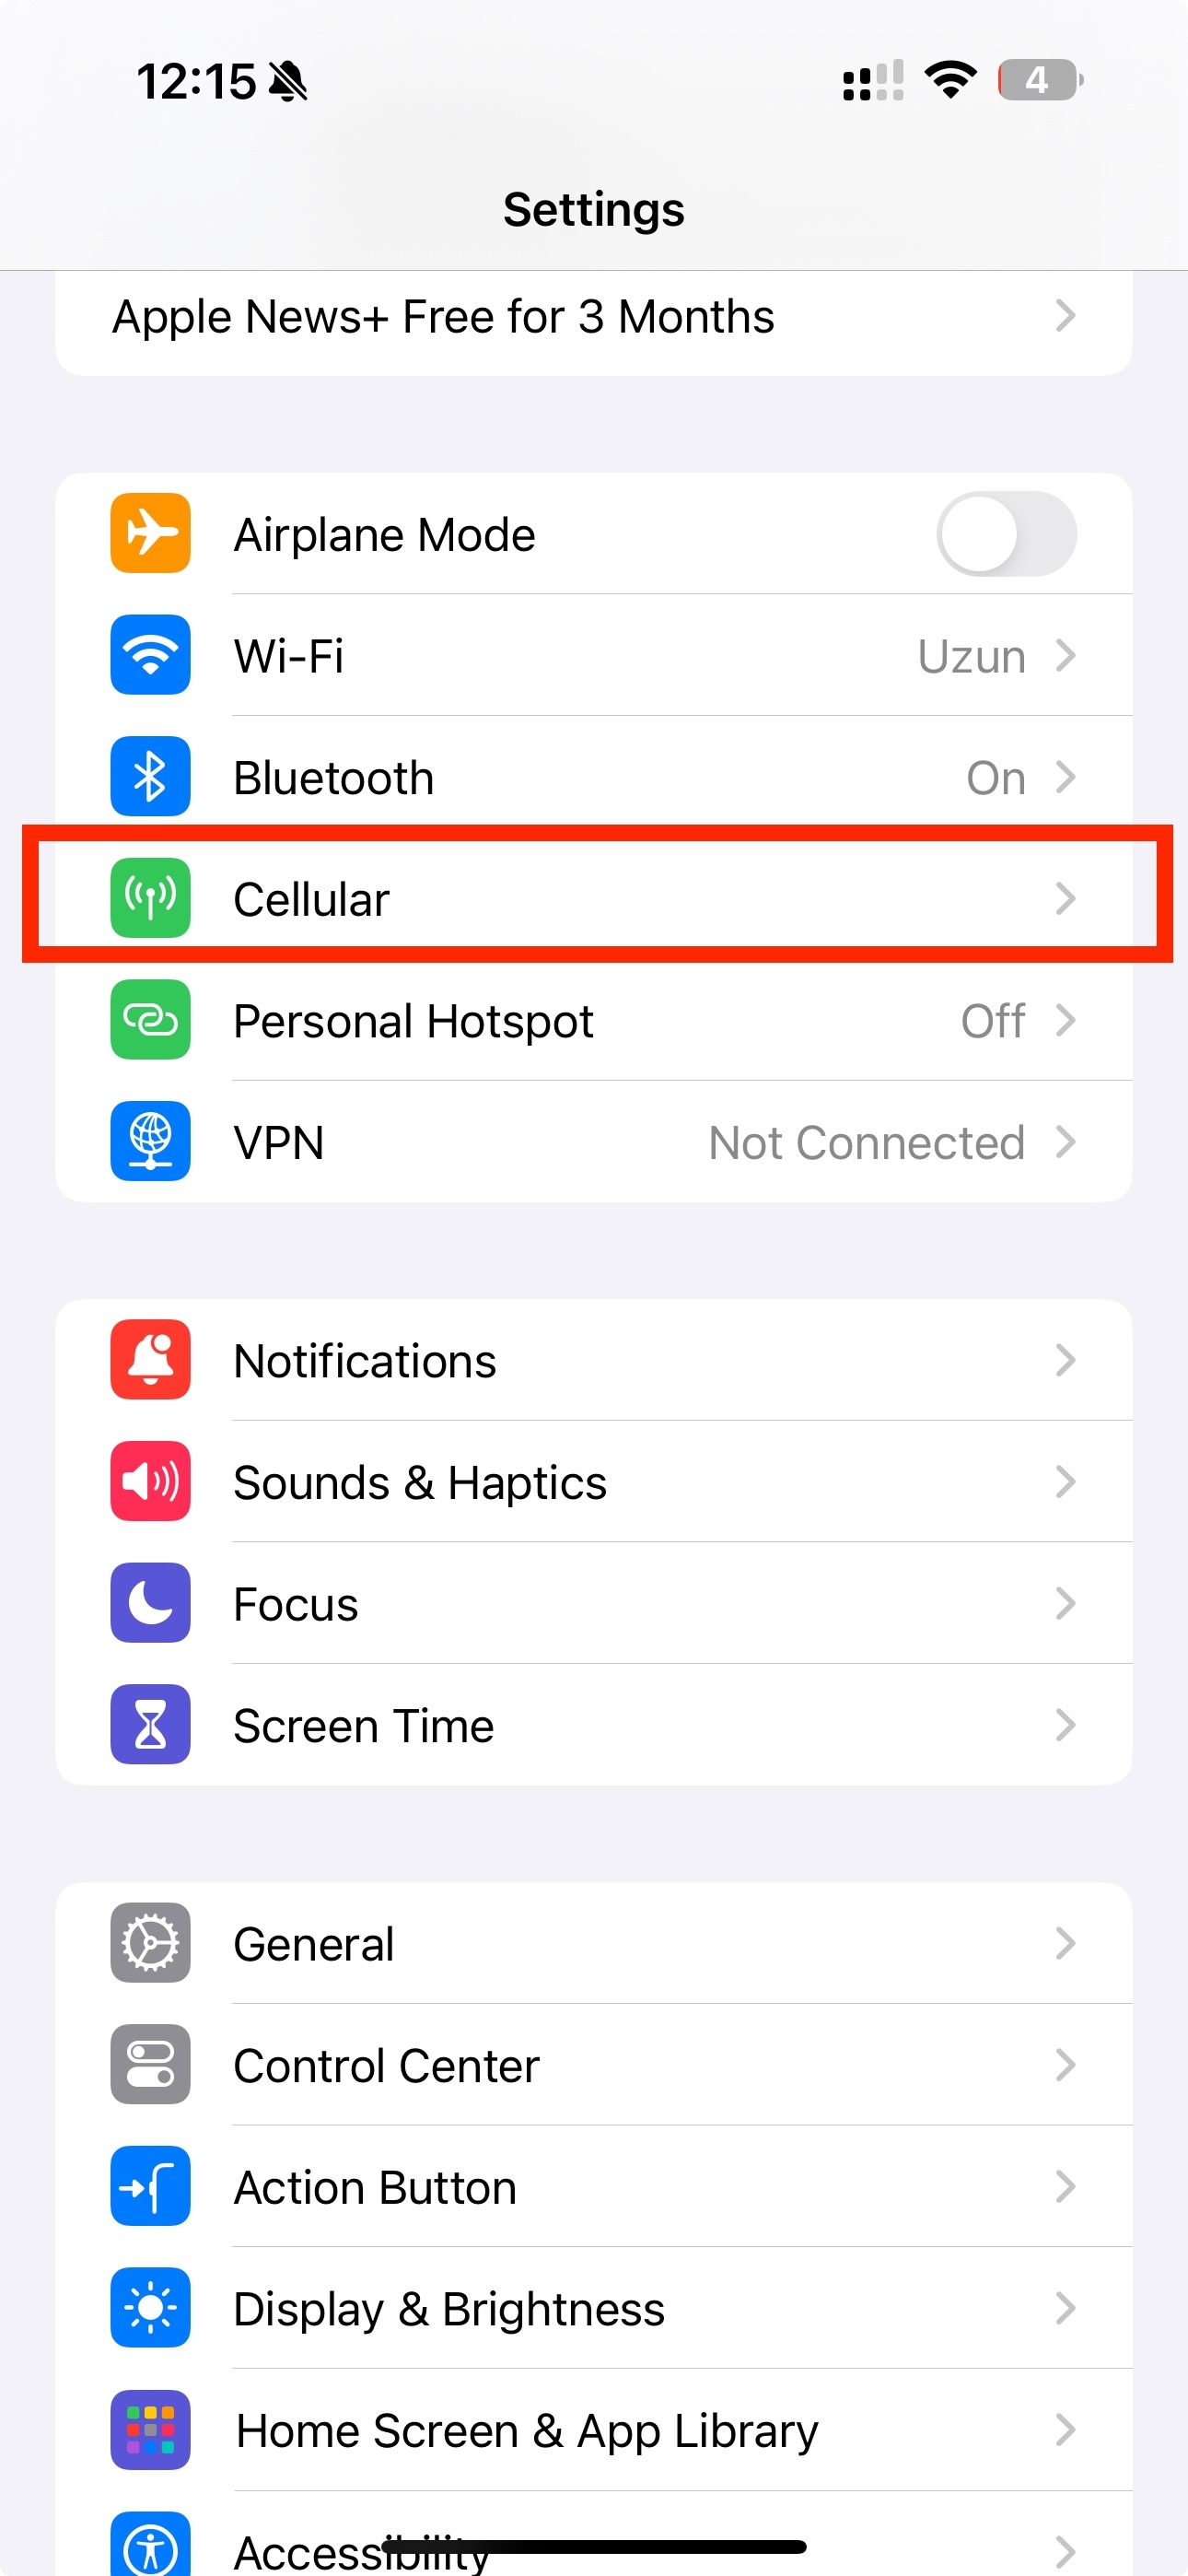
Go into your "Settings" and click on "Cellular"
-
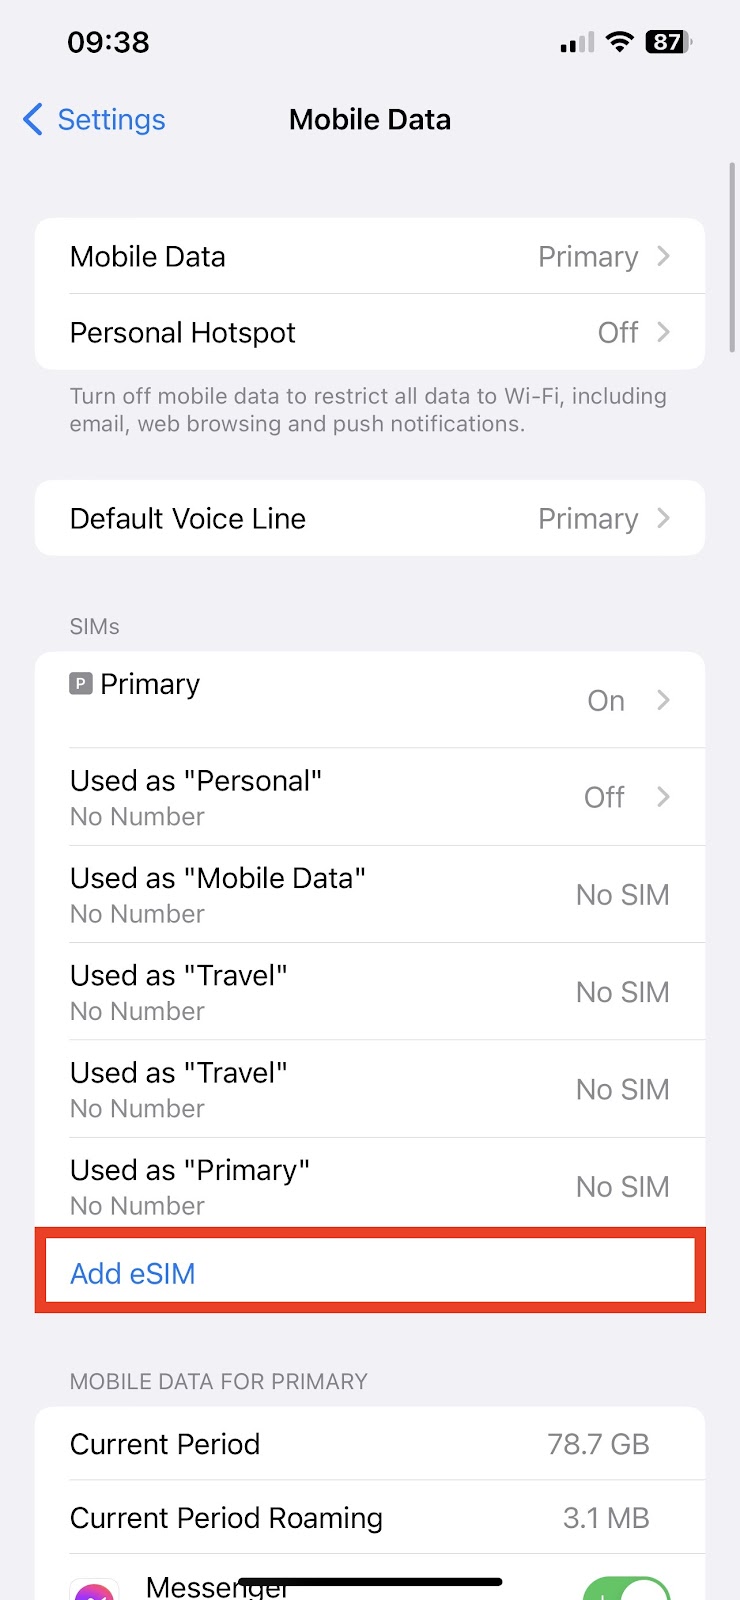
Tap Add eSIM
-
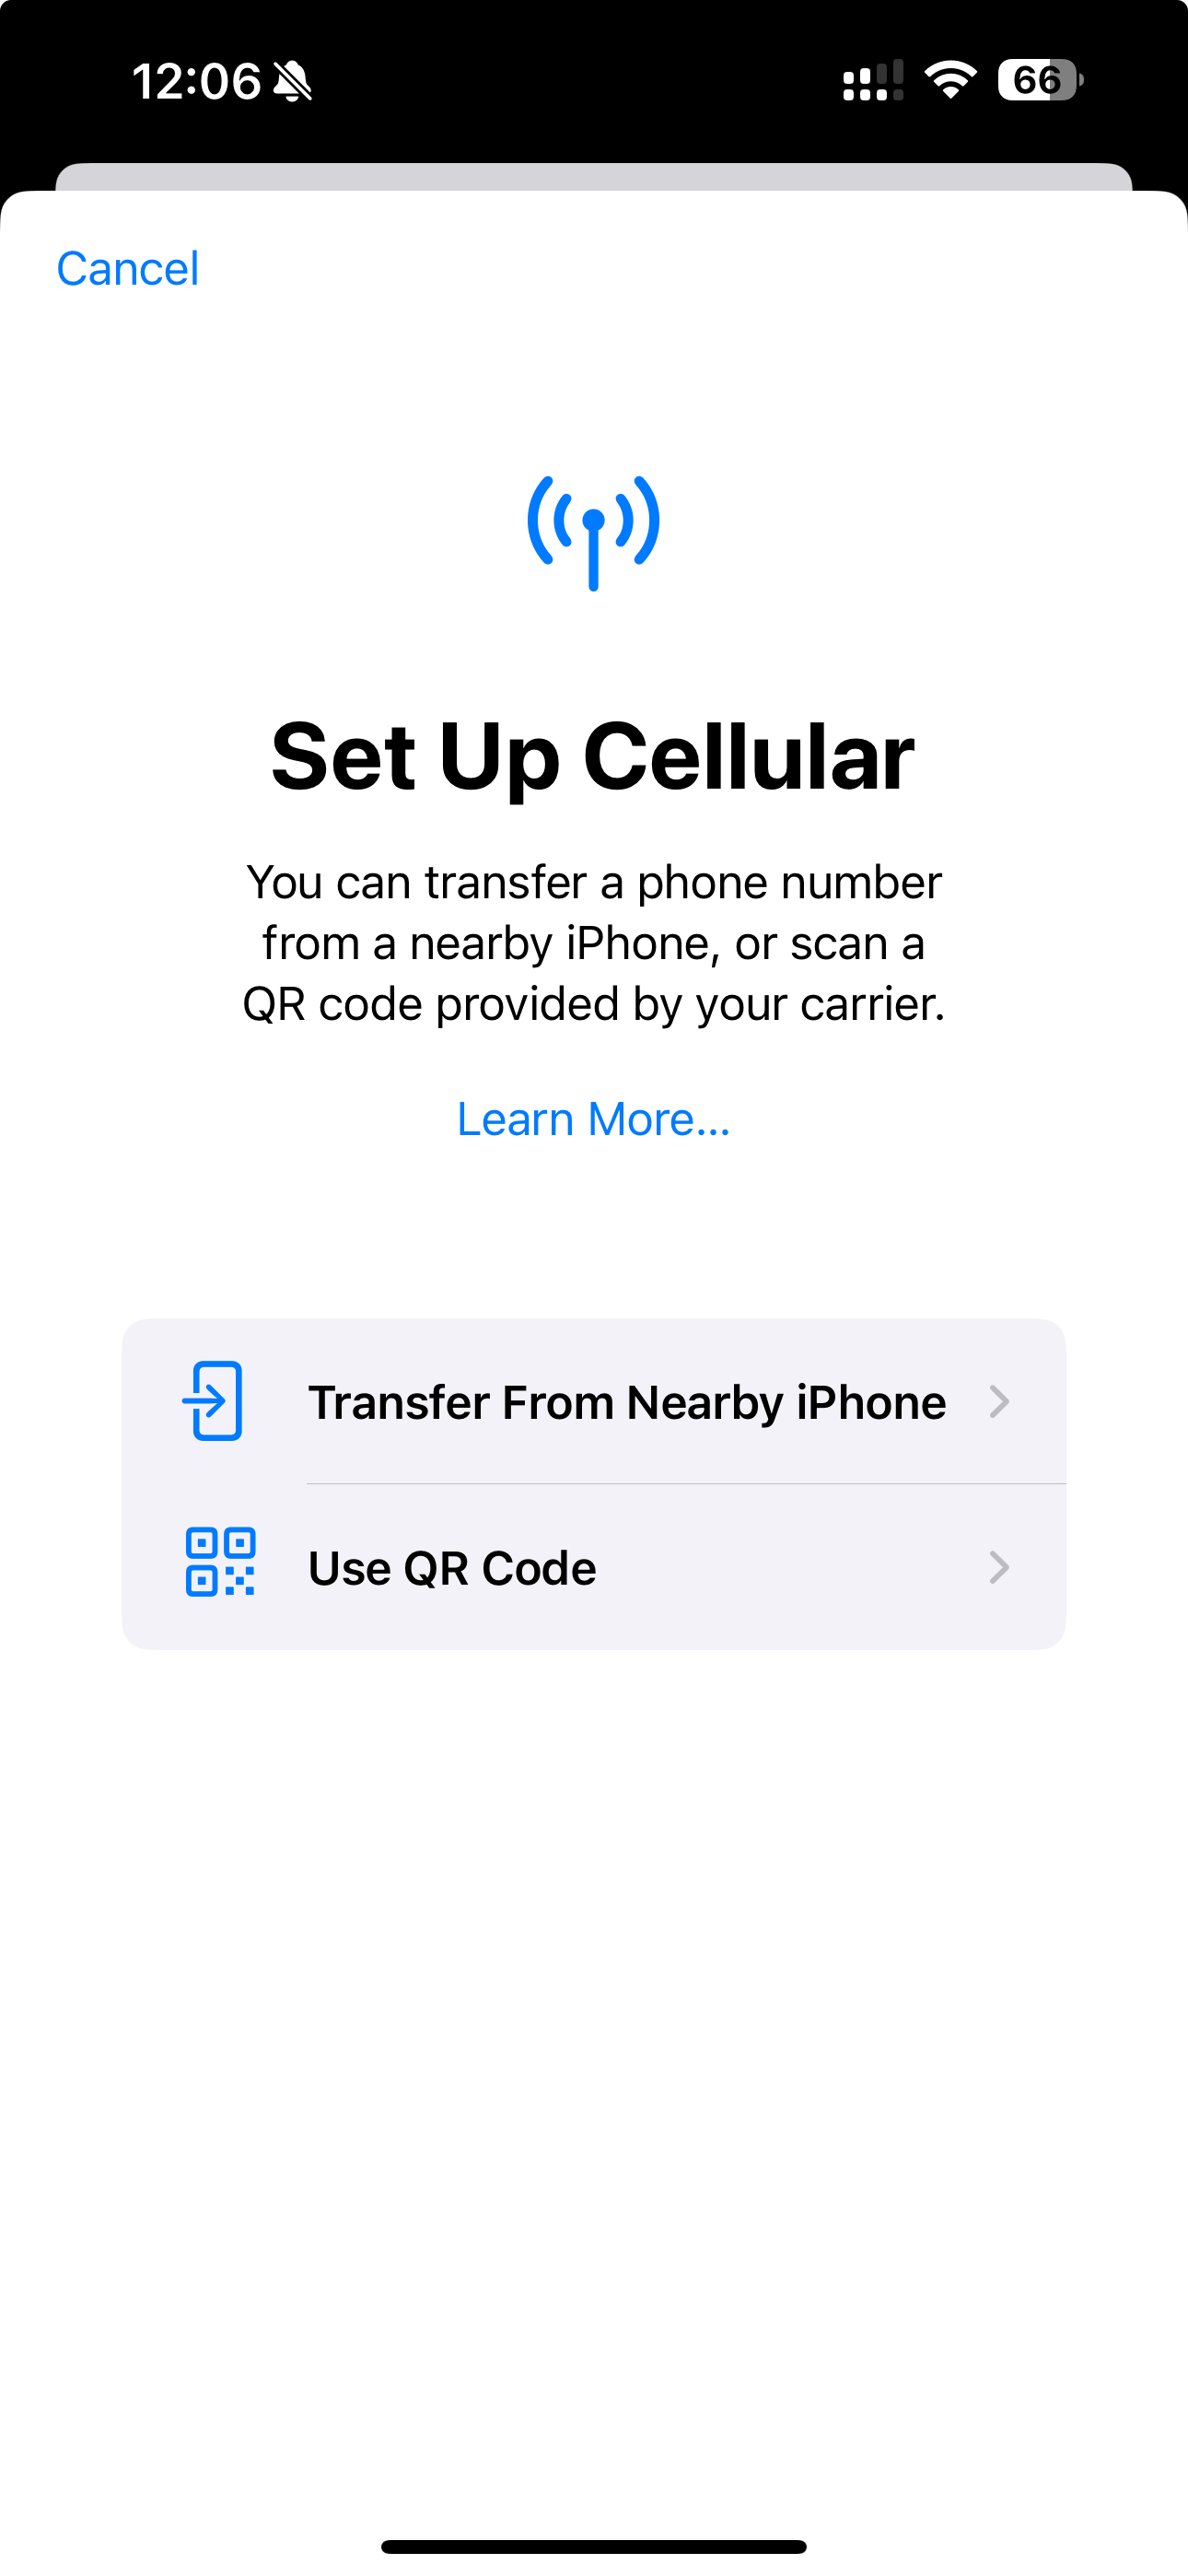
Use QR Code
-
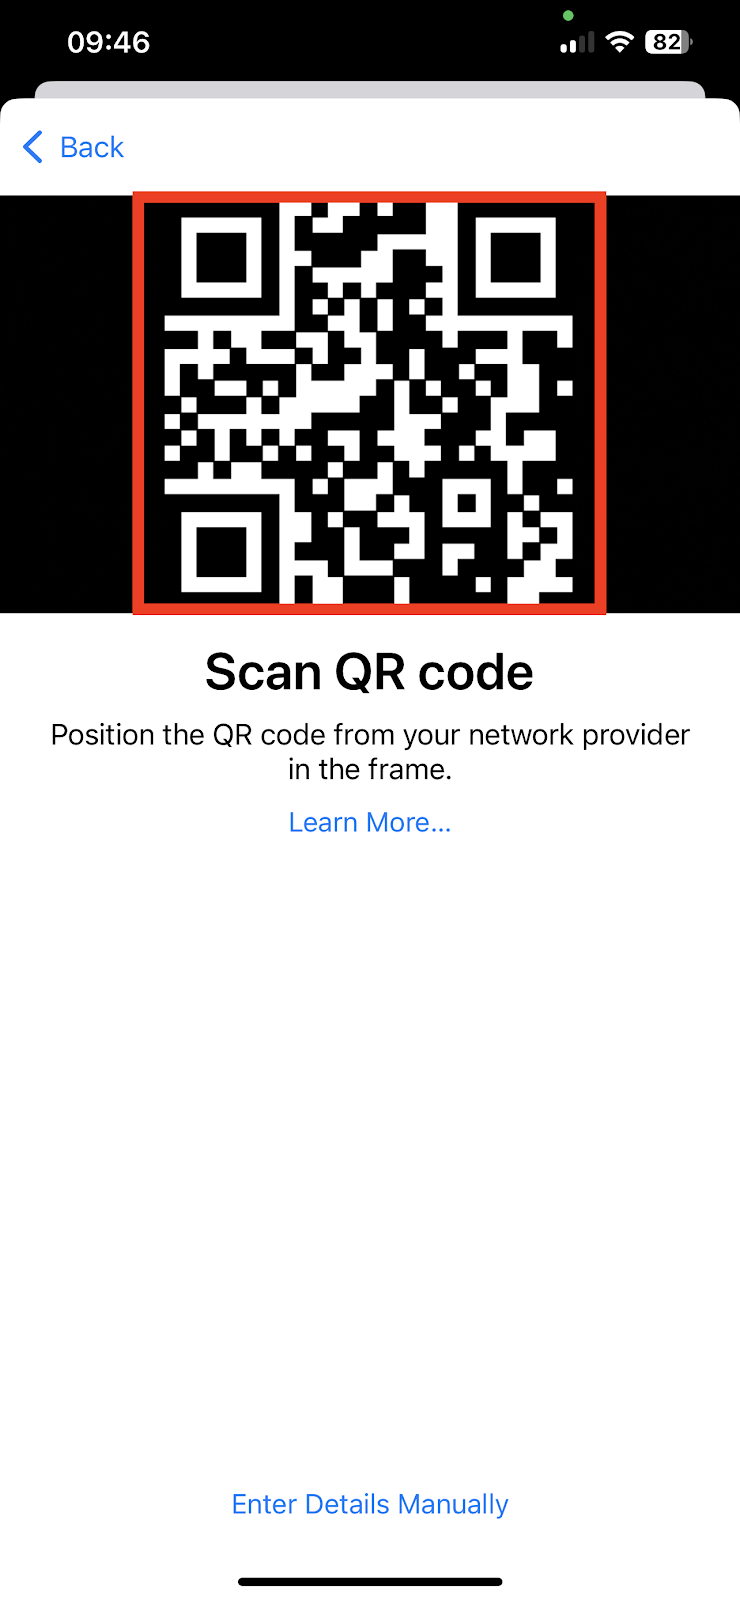
Scan QR code provided. (You can find this information in the confirmation email or on the order confirmation page, or in the account page.)
-
Click "Continue" >

-
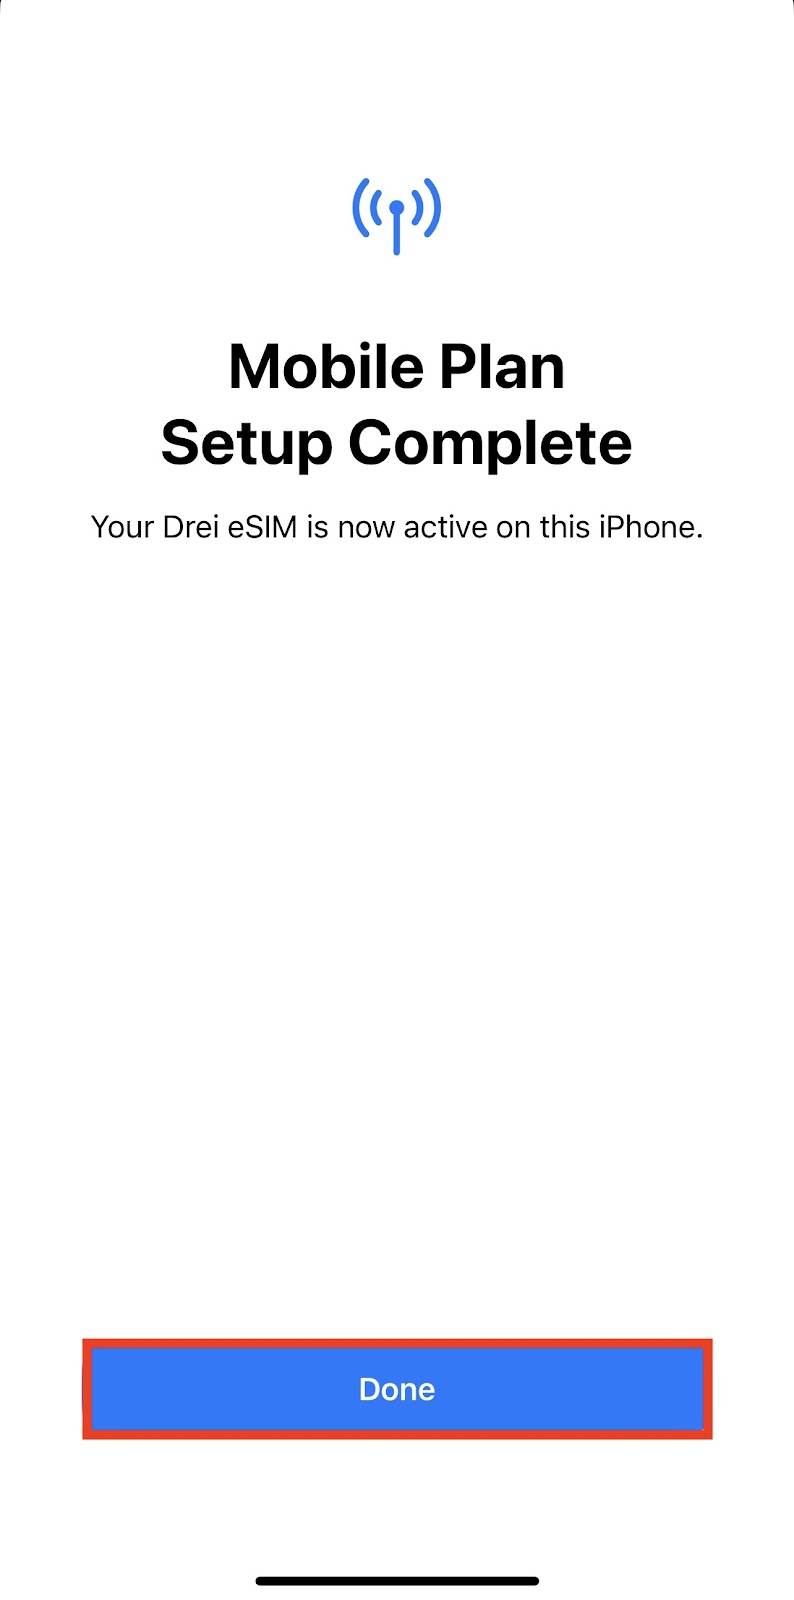
Tap "Done"
-
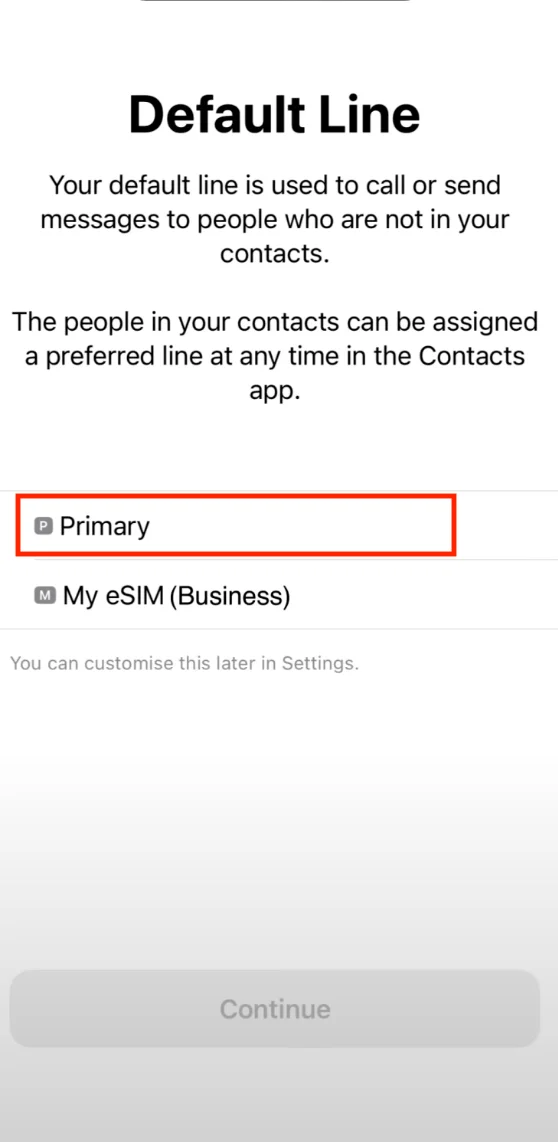
Now select the Default Line
-
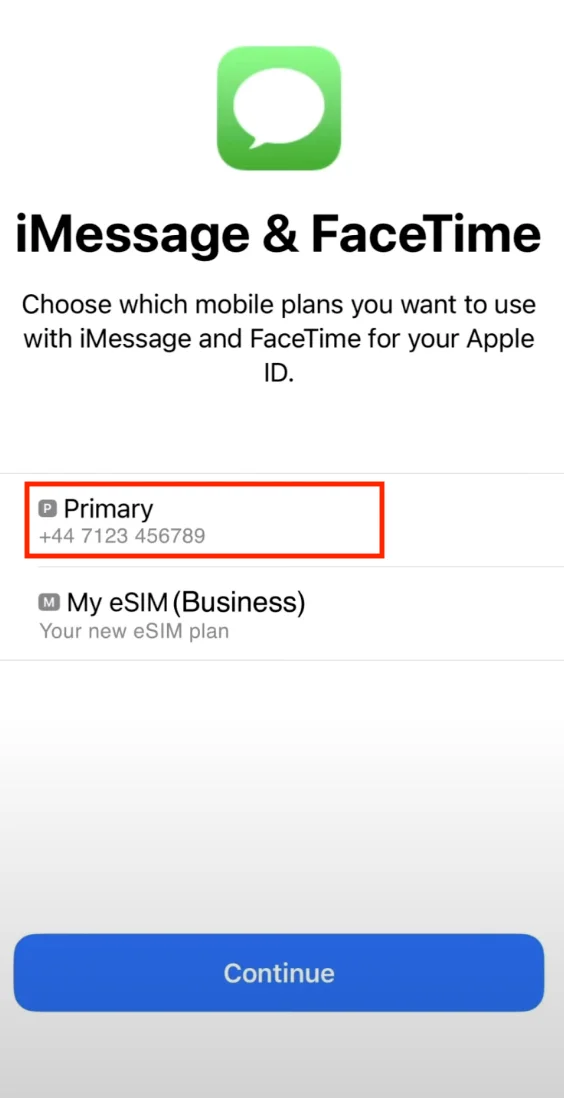
Select Primary for iMessage & Facetime
-
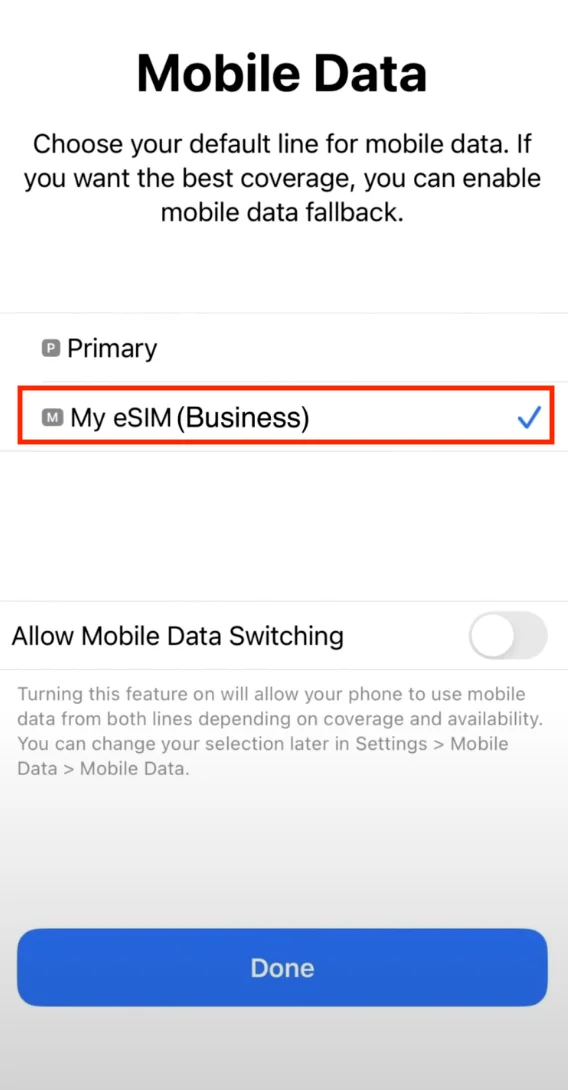
Select new eSIM for Data
-
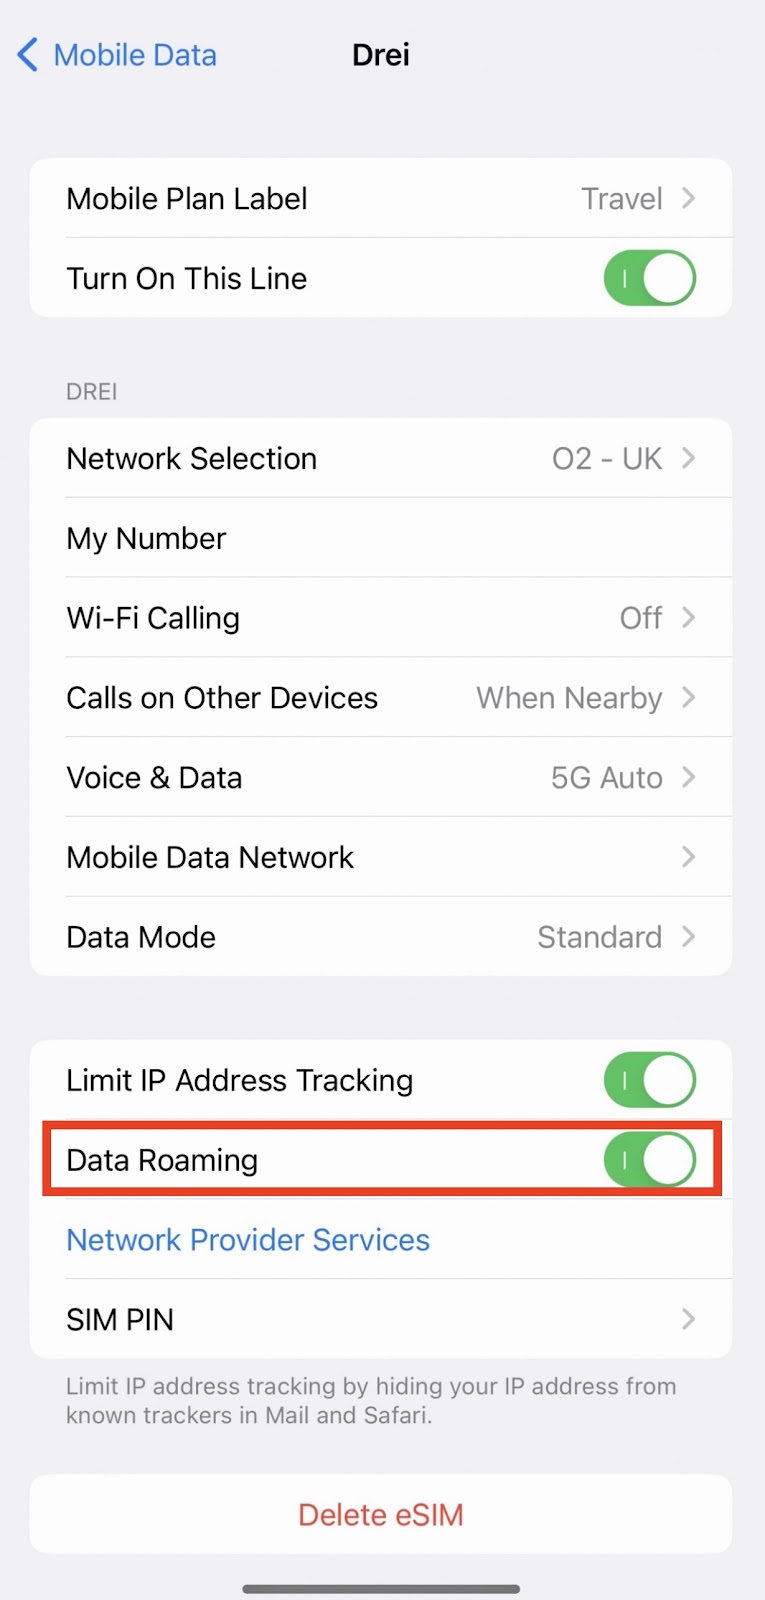
Reminder: Data Roaming MUST be "ON" in order for the eSIM to work. Go back into "Settings" > Tap "Mobile Data / Cellular" > Click on the eSIM you want to check Data Roaming for > toggle the switch to "ON".
Step 2. Activate International Roaming
When the network access is successful but there is no network connection, please check and manually set the APN
-
Data Roaming MUST be "ON" in order for the eSIM to work. Go back into "Settings" > Tap "Mobile Data / Cellular" > Click on the eSIM you want to check Data Roaming for > toggle the switch to "ON".
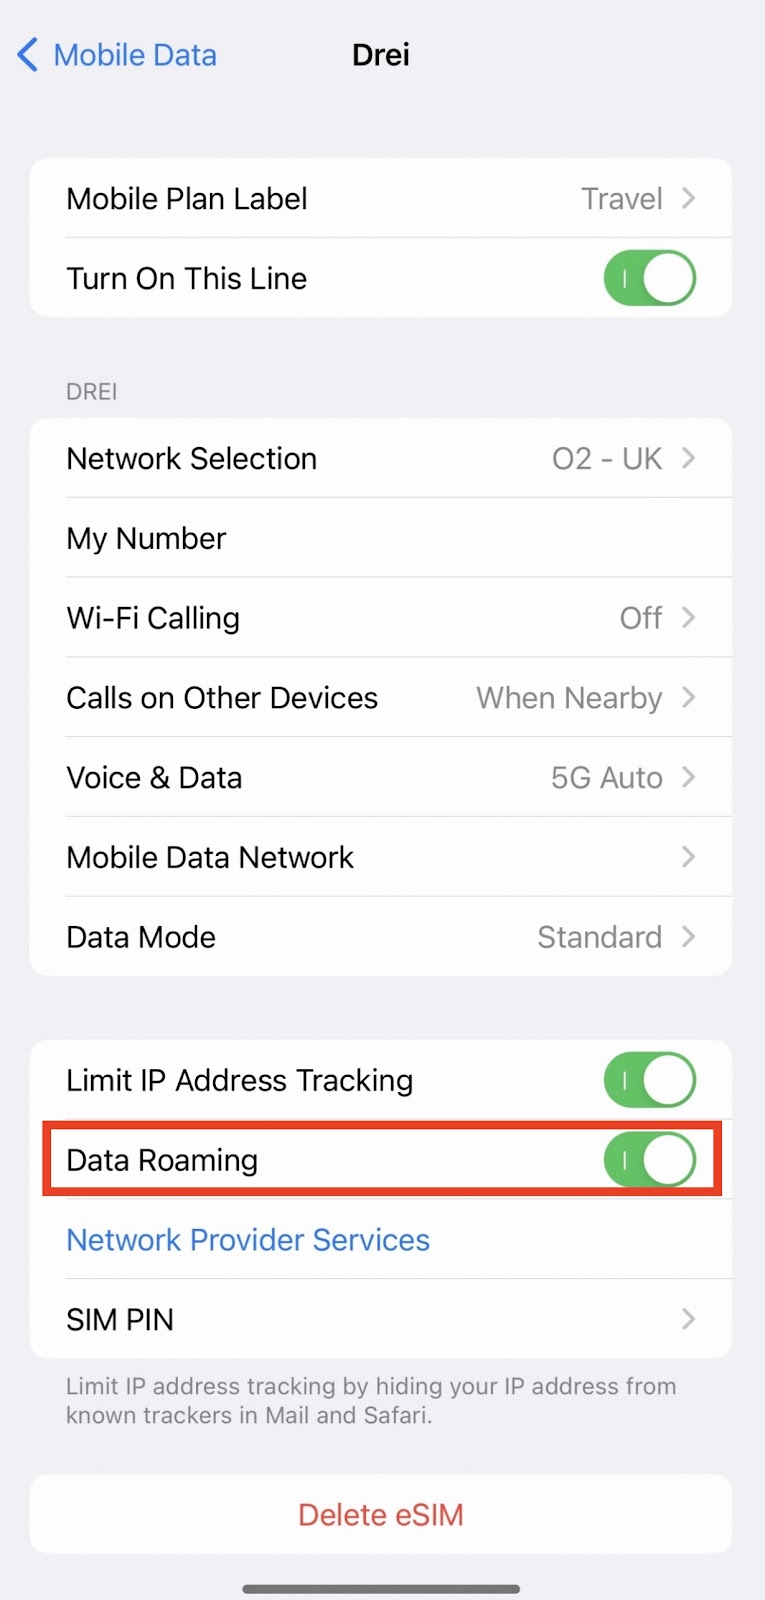
-
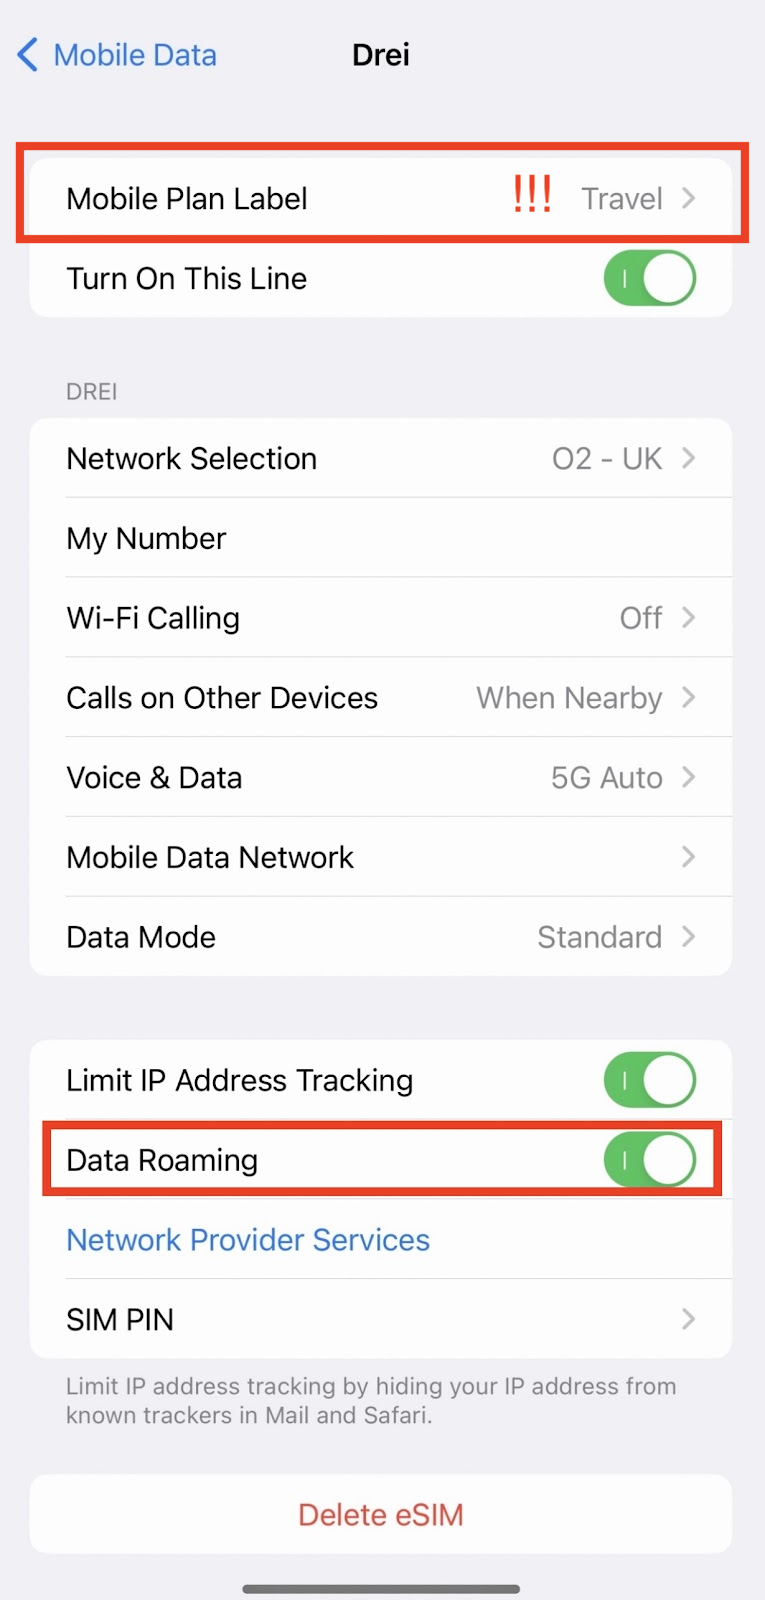
Make sure you selected the eSIM you set up for Data. In this example "Travel"
Other considerations
If you have signal but no data please check your data settings. Make sure you selected the eSIM you set up for Data. In this example "Travel"
Data Roaming MUST be "ON" in order for the eSIM to work. Go back into "Settings" > Tap "Mobile Data / Cellular" > Click on the eSIM you want to check Data Roaming for > toggle the switch to "ON".
Step 1.Install eSIM
-
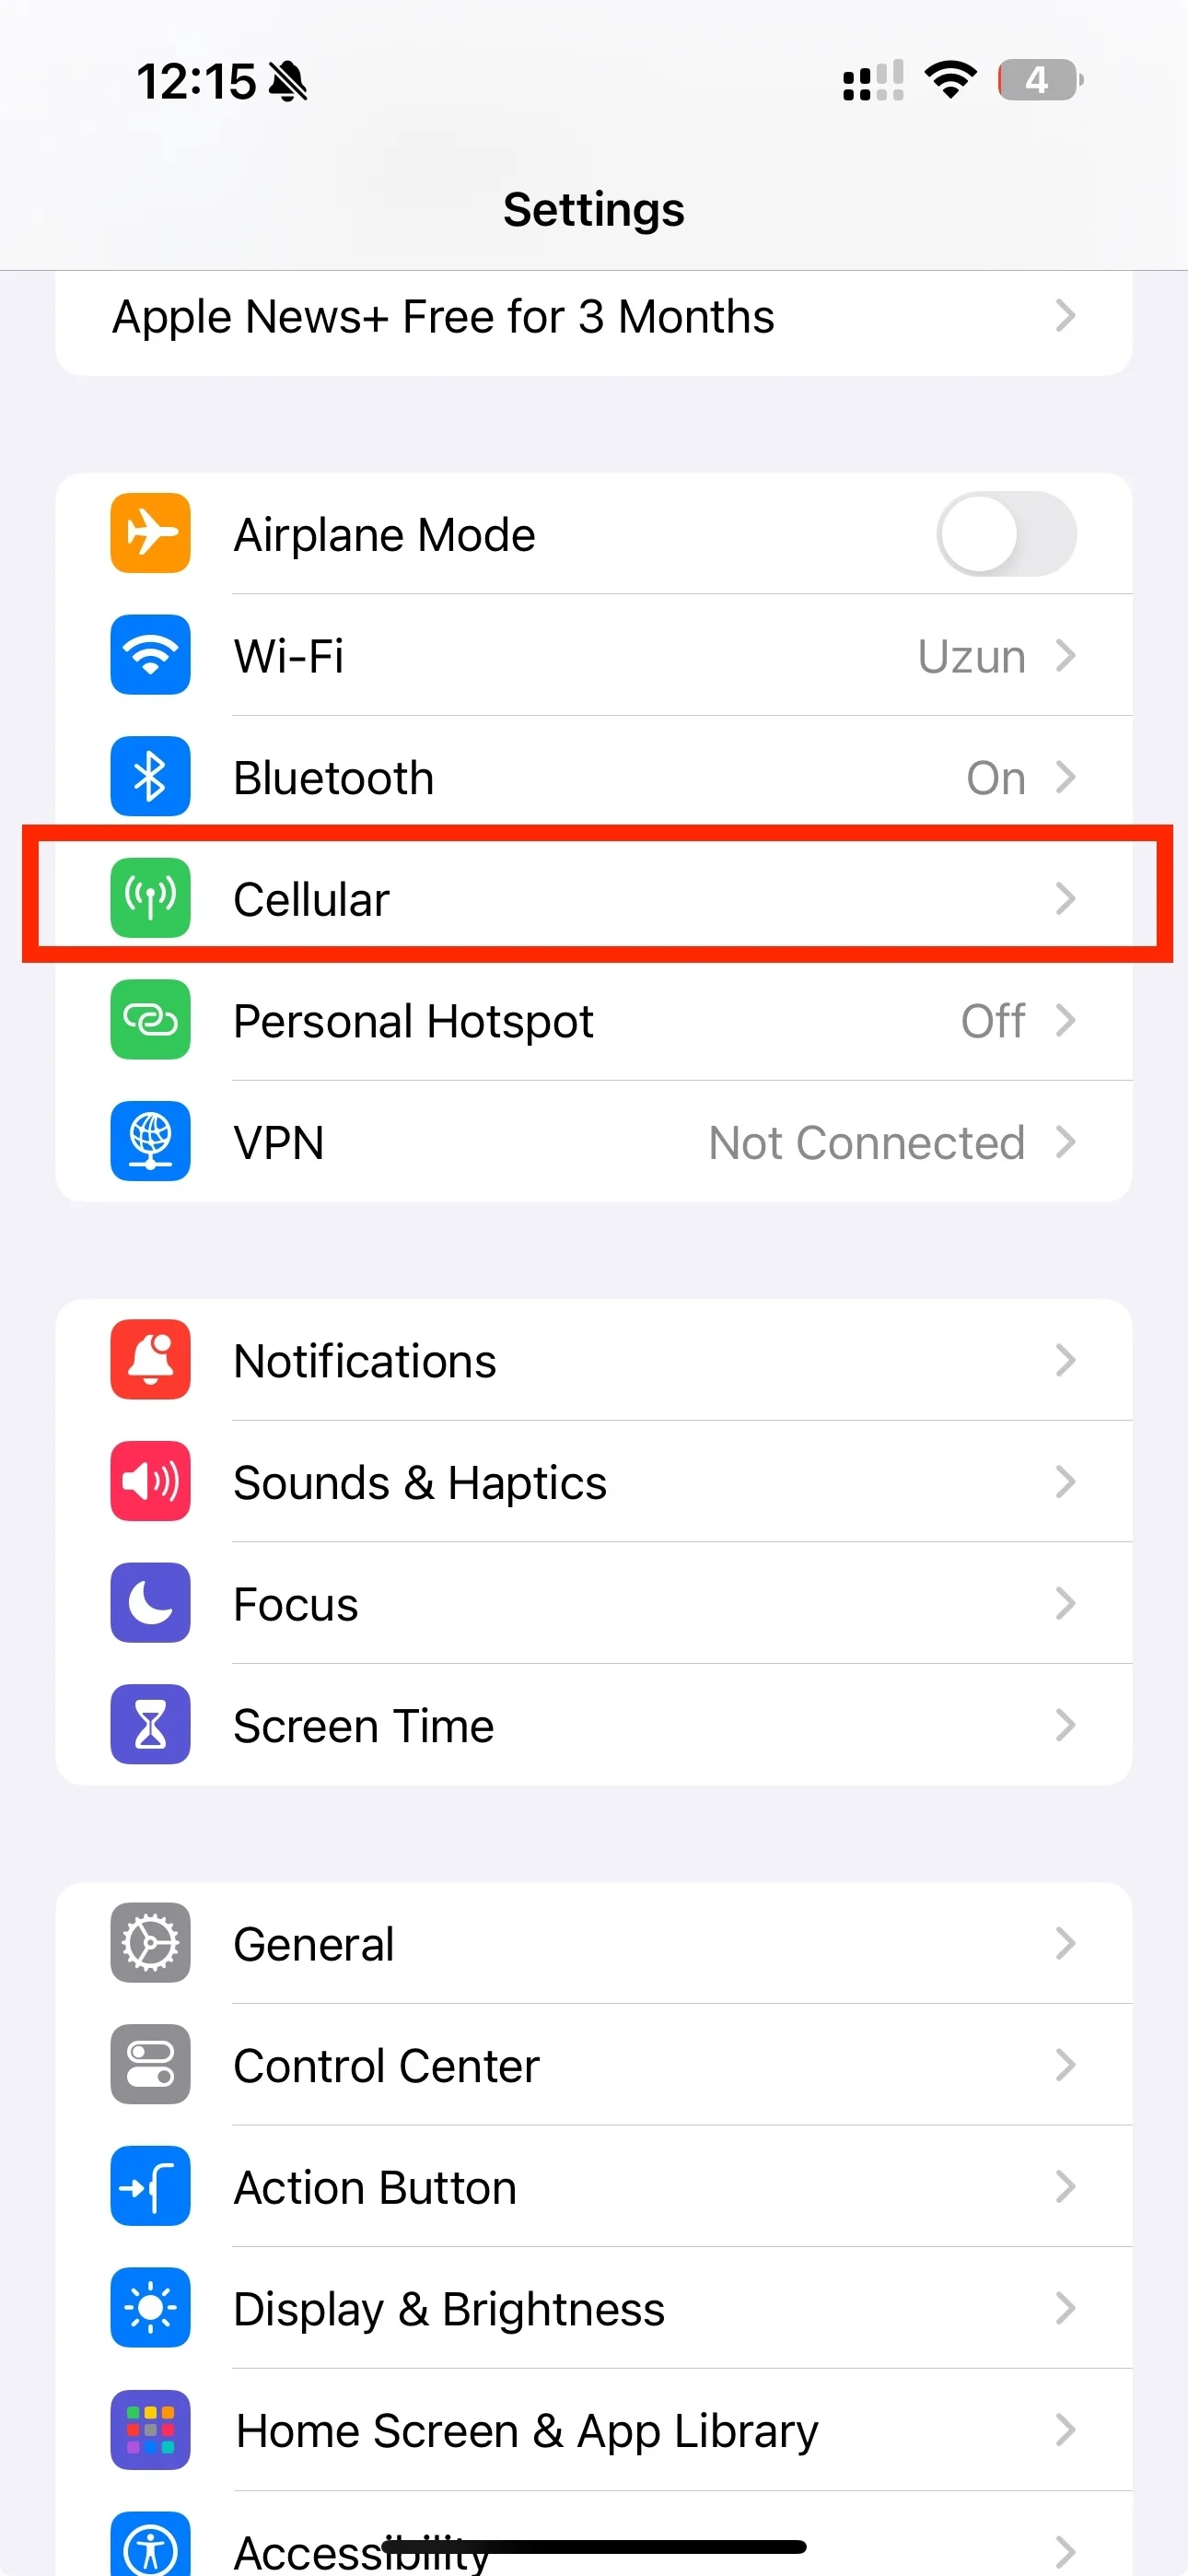
Go into your "Settings" and click on "Mobile Data / Cellular".
-
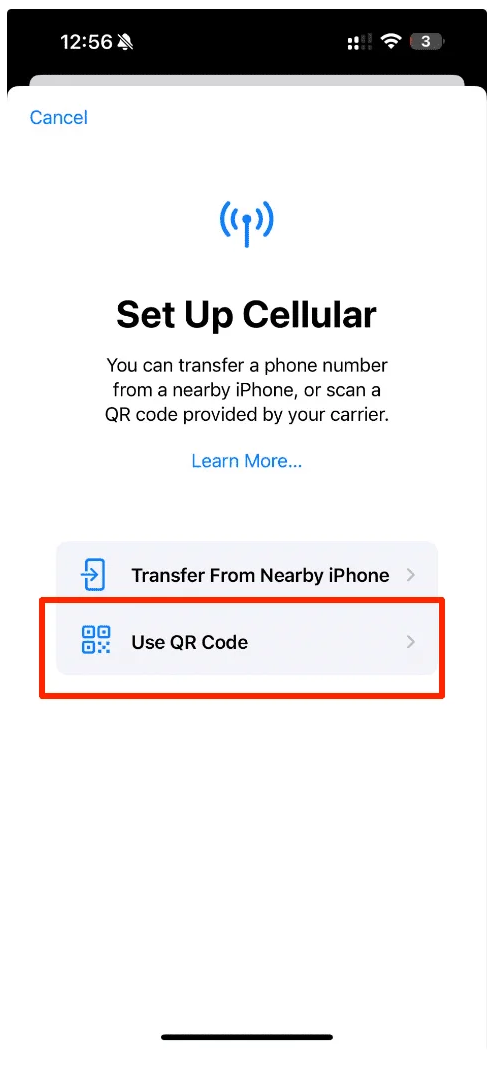
Tap "Add eSIM" > "Use QR Code"
-
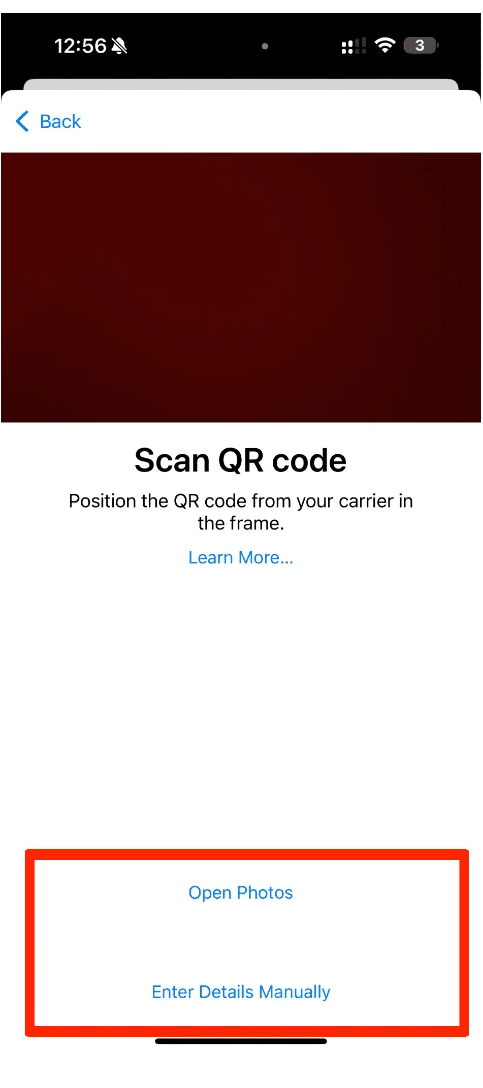
Tap Enter Details Manually - Alternatively you can click "Open Photos" and select QR code you reveiced via e-mail. You can take the screenshot of the QR code that you received via e-mail and intall it with this option.
-
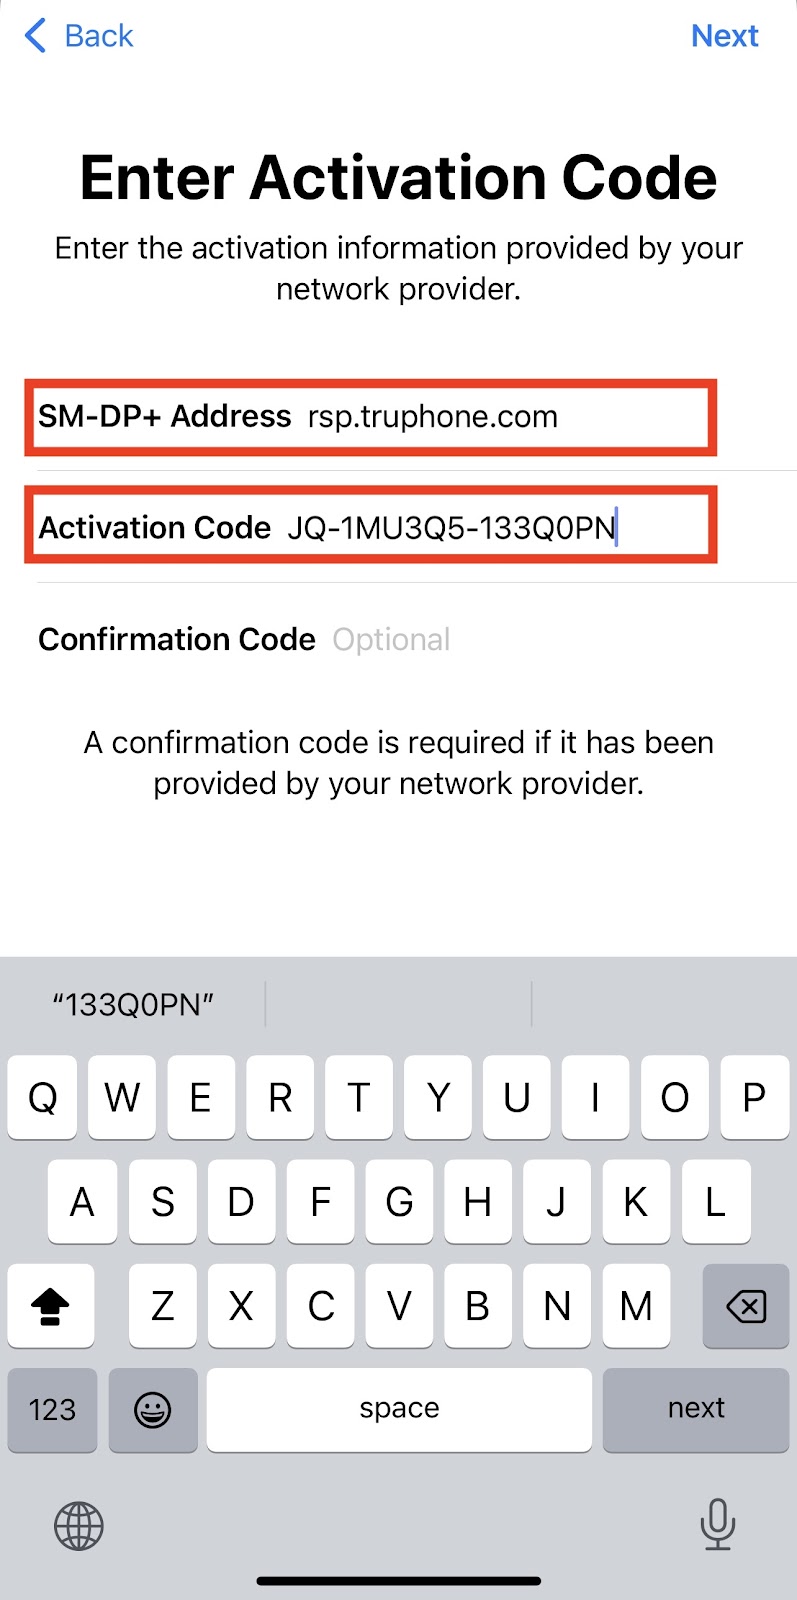
Enter the "SMDP Address" and the "Activation Code" provided, (You can find this information in the confirmation email or on the order confirmation page, or in the account page.) > Tap "Next" Leave the "confirmation code" section blank.
-
Click "Continue" and wait for it to finish.

-
Once completed, click "Done".

-
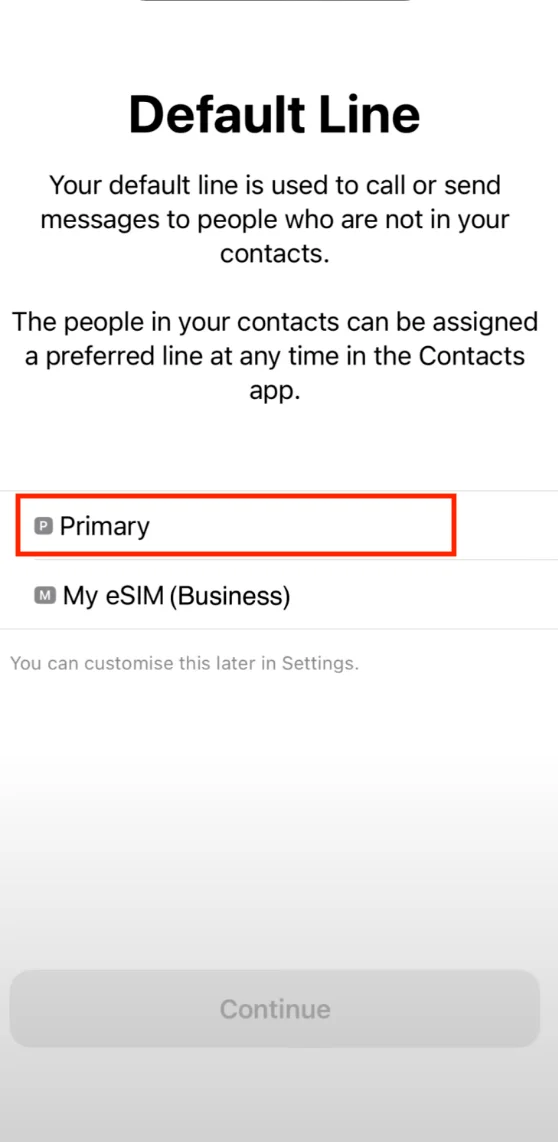
Now select the Default Line
-
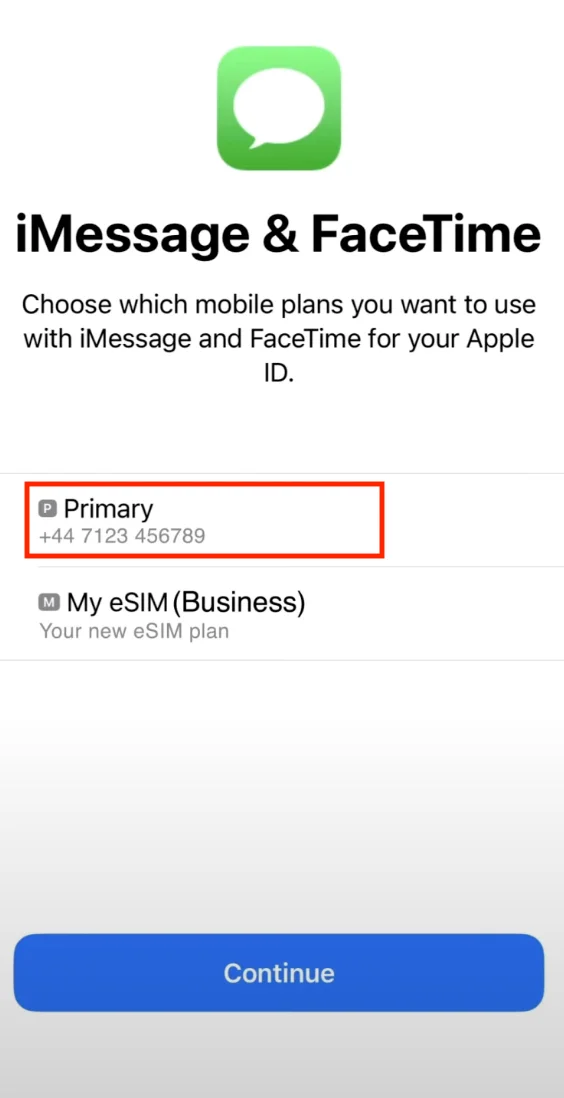
Select Primary for iMessage & Facetime
-
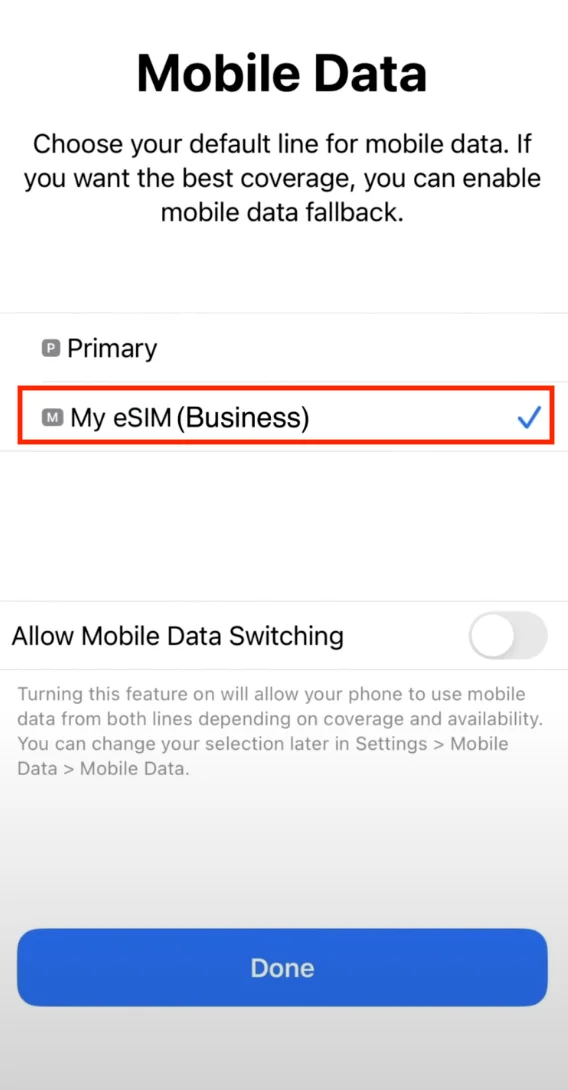
Select new eSIM for Data
-
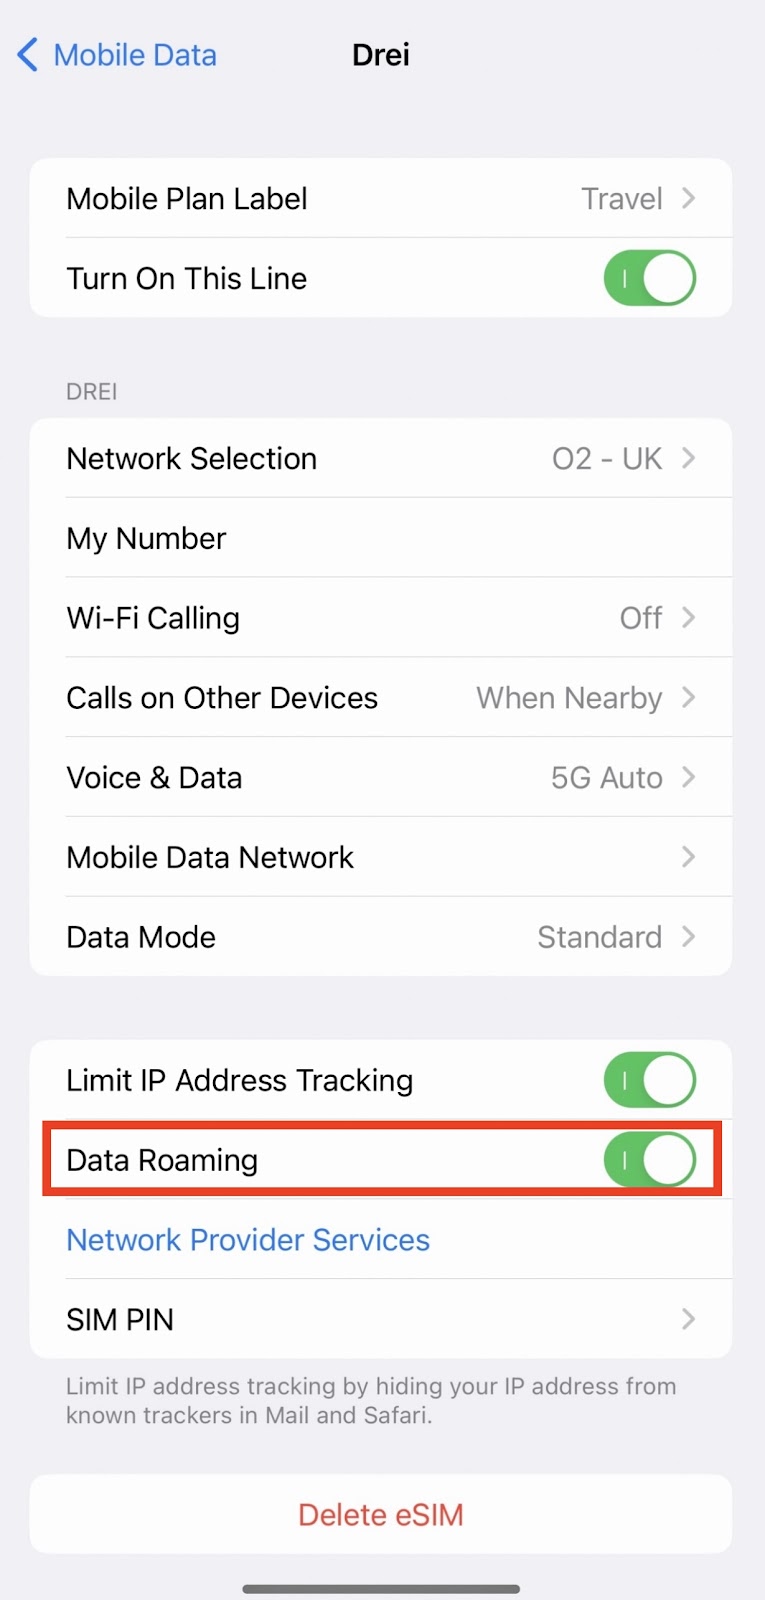
Reminder: Data Roaming MUST be "ON" in order for the eSIM to work. Go back into "Settings" > Tap "Mobile Data / Cellular" > Click on the eSIM you want to check Data Roaming for > toggle the switch to "ON".
Step 2. Activate International Roaming
When the network access is successful but there is no network connection, please check and manually set the APN
-
Go into your "Settings" and click on "Cellular"
-
Select eSIM you installed
-
Select Cellular Data Network
-
Check the APN name matched with APN you received in the confirmation e-mail. Note: APN will be set up automatically. You can skip this step.
Other considerations
If you have signal but no data please check your APN settings.
Reminder: Data Roaming MUST be "ON" in order for the eSIM to work.
Step 1.Install eSIM
-
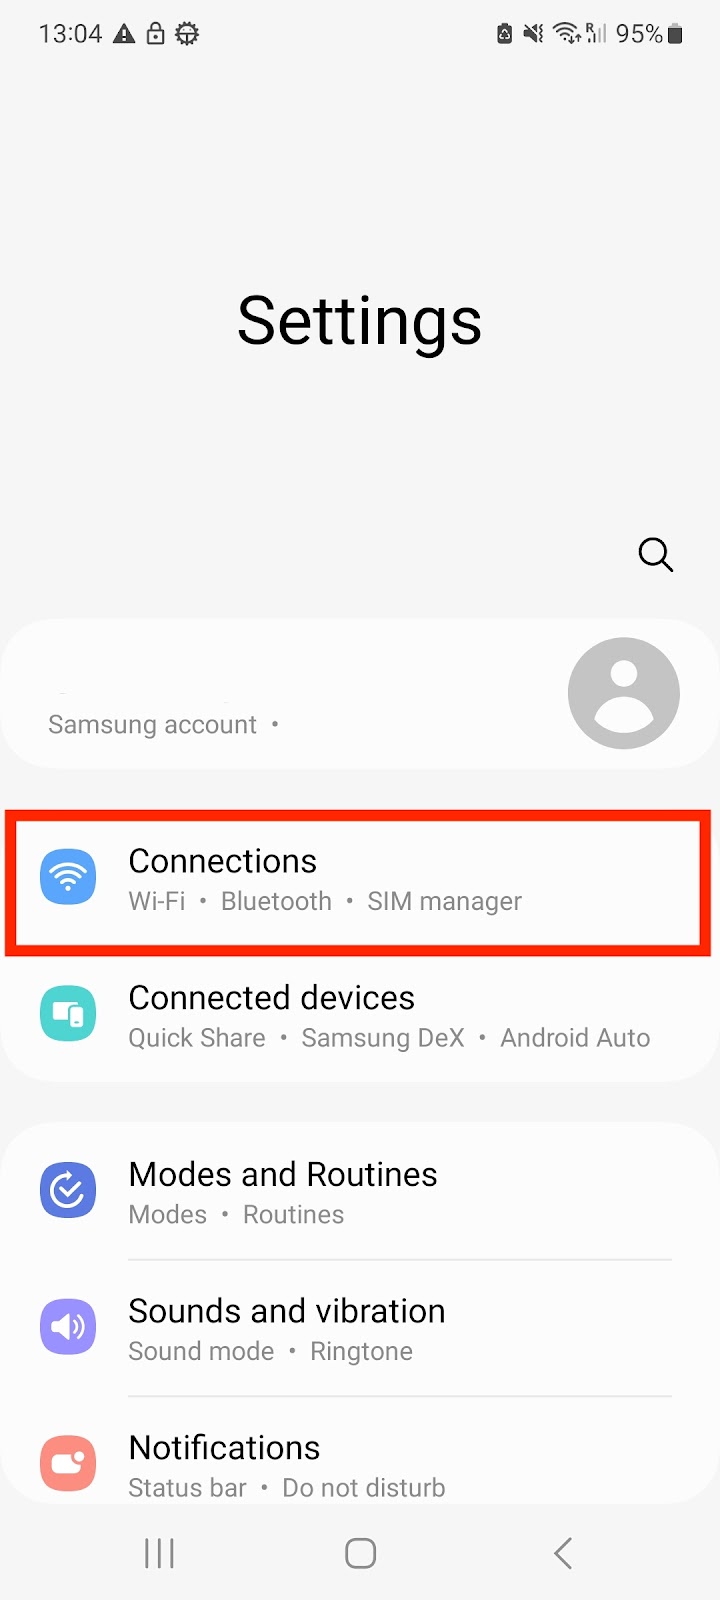
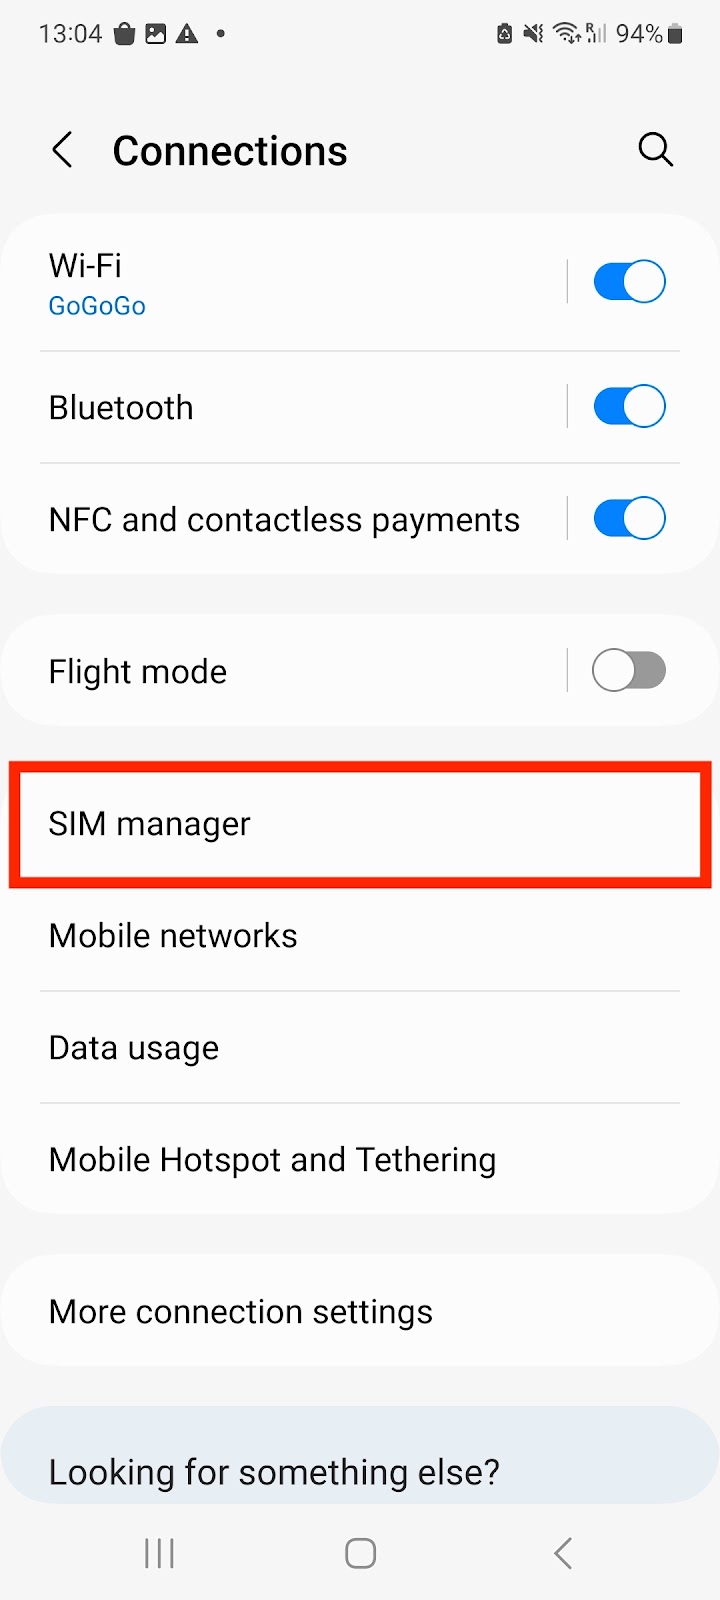
Go into Settings > Connections
-
Tap Sim Manager
-
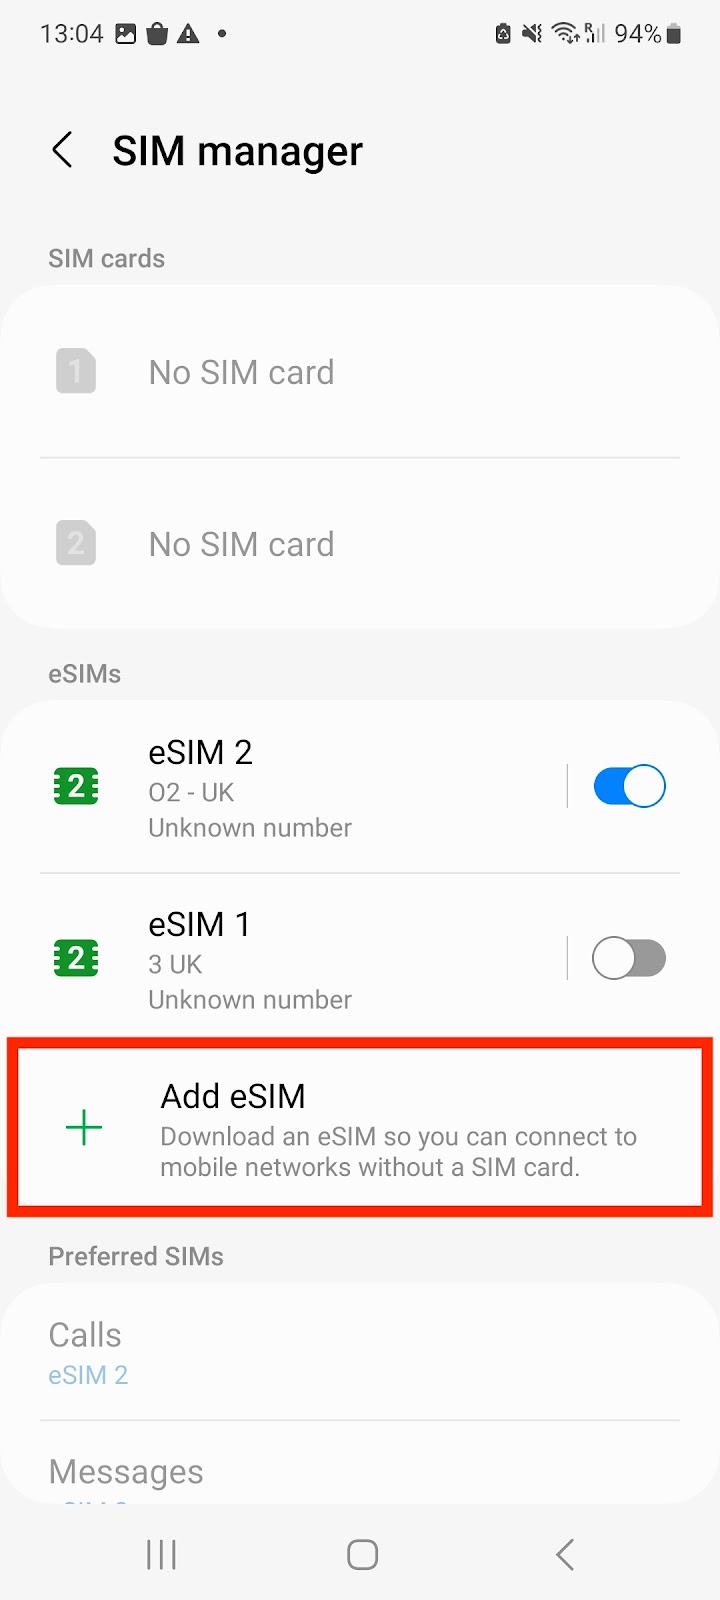
Tap Add eSIM
-
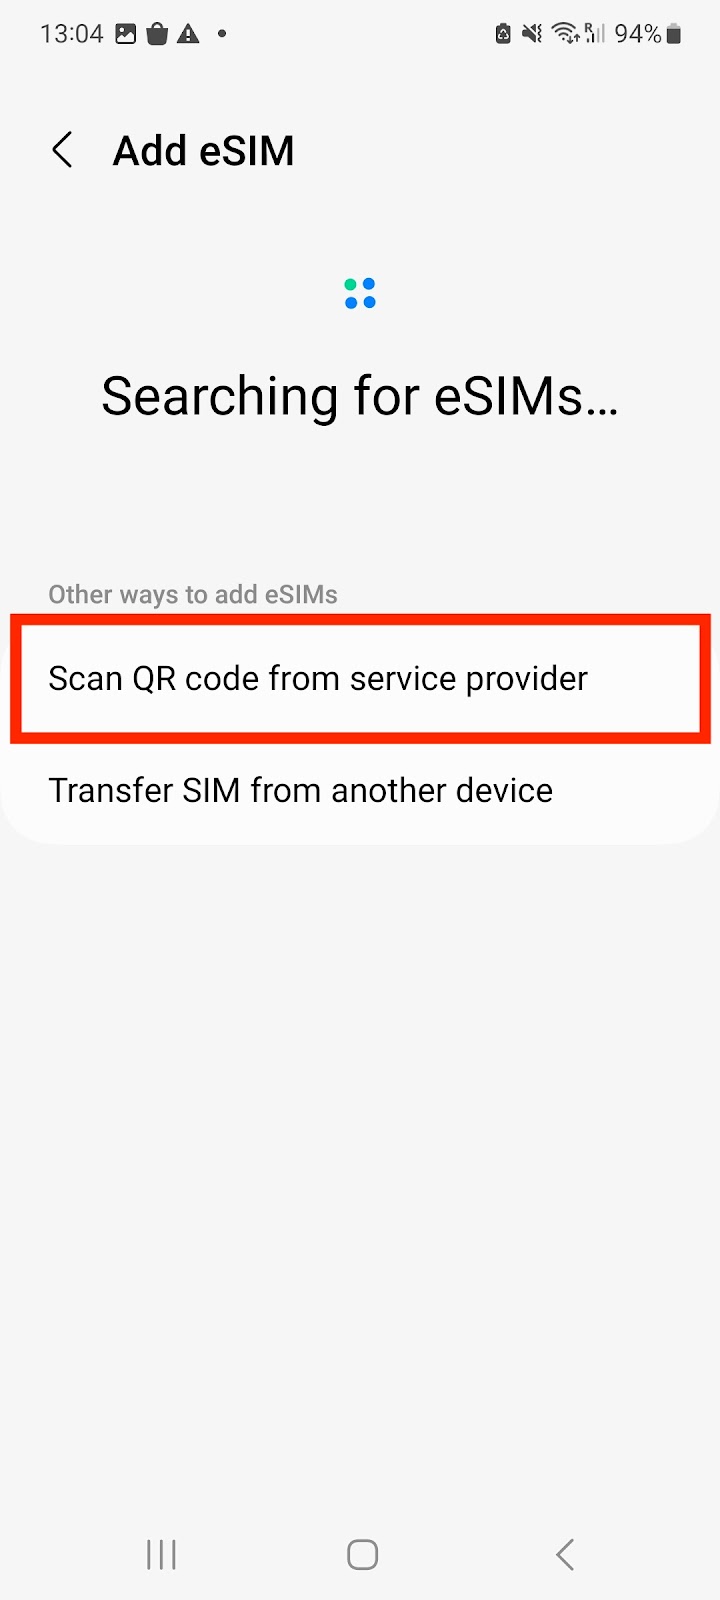
Select the option Scan QR code from service provider
-
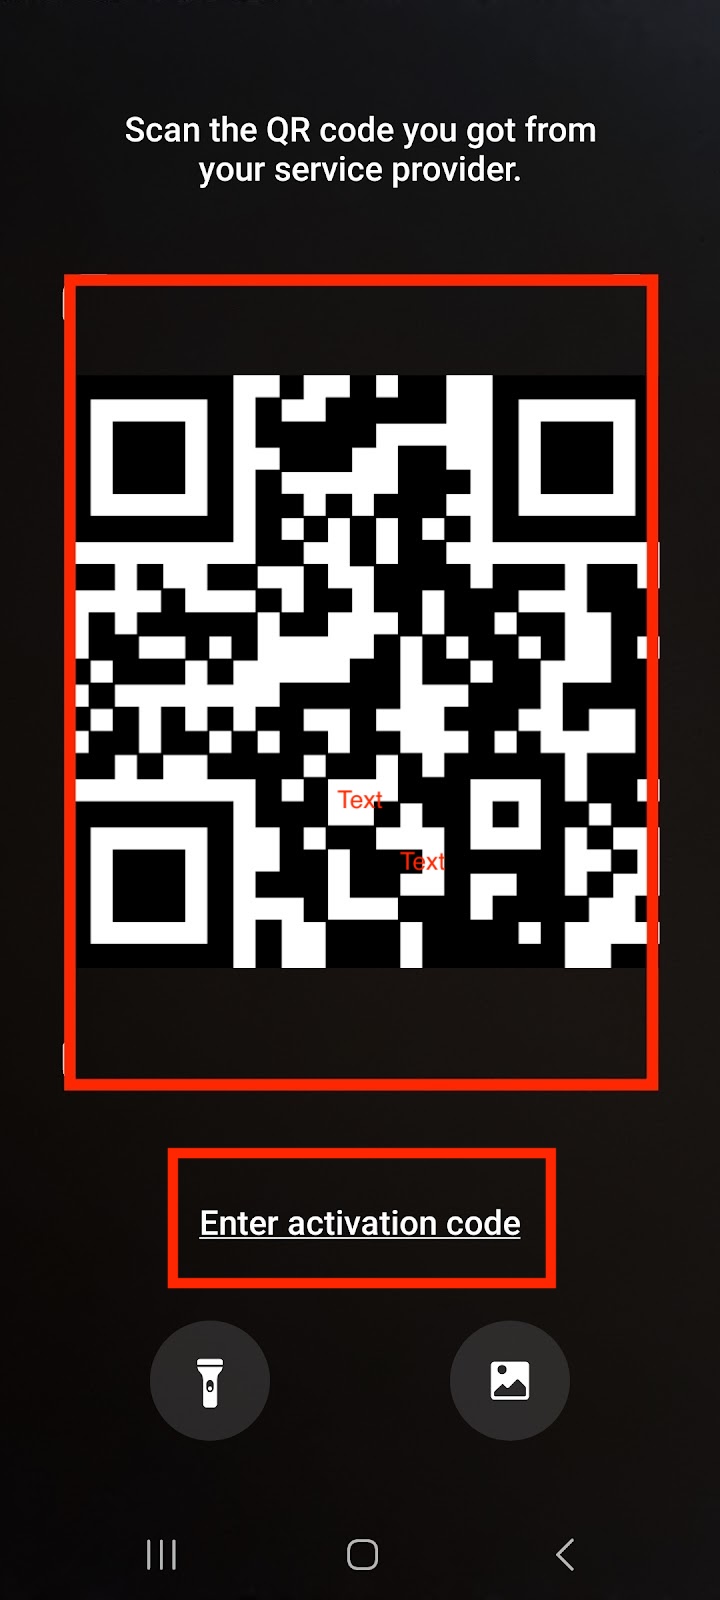
Scan the QR code
-
Click "add" and it will enable the installation process.

-
Once this has been completed, go back into "Connections"
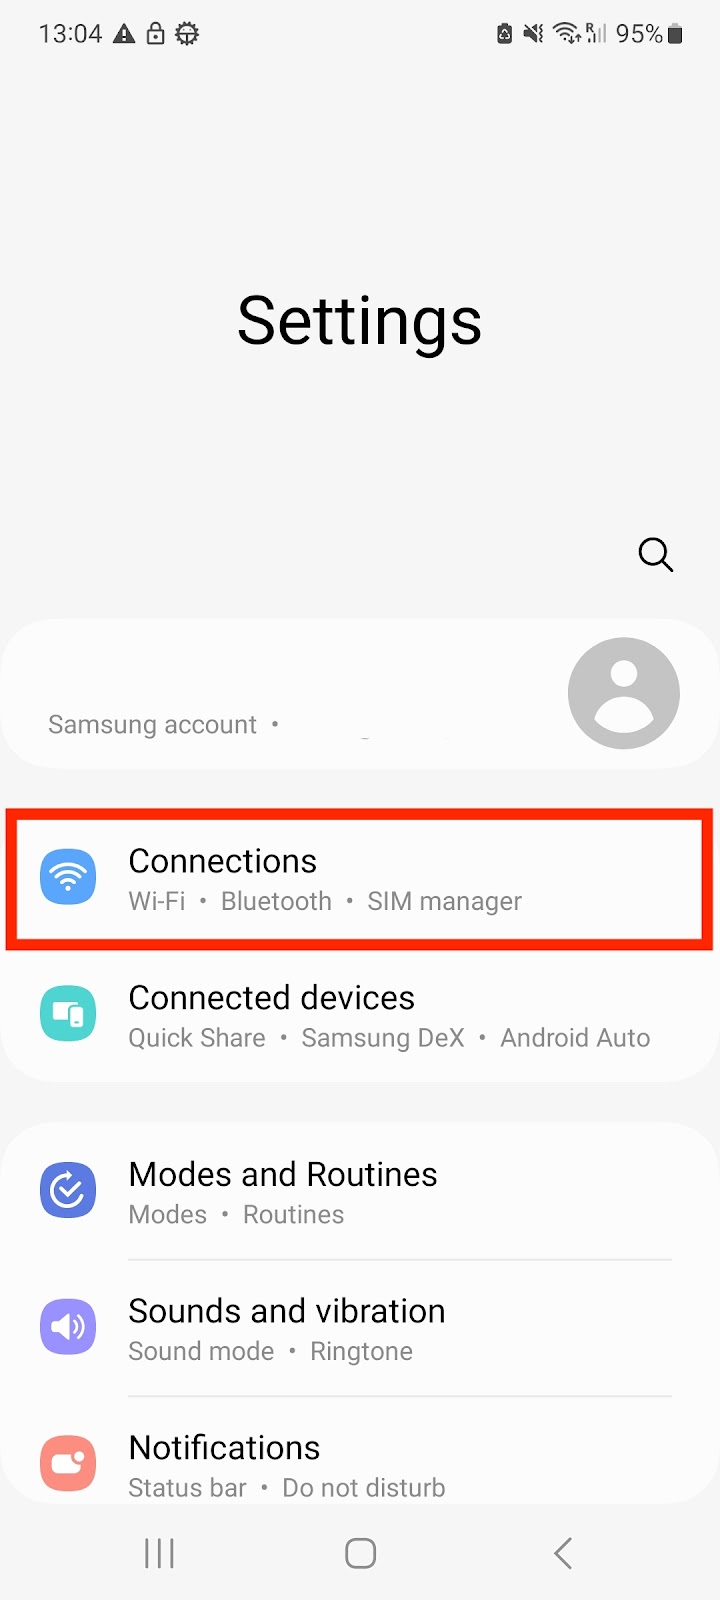
-
Tap "Mobile Networks"
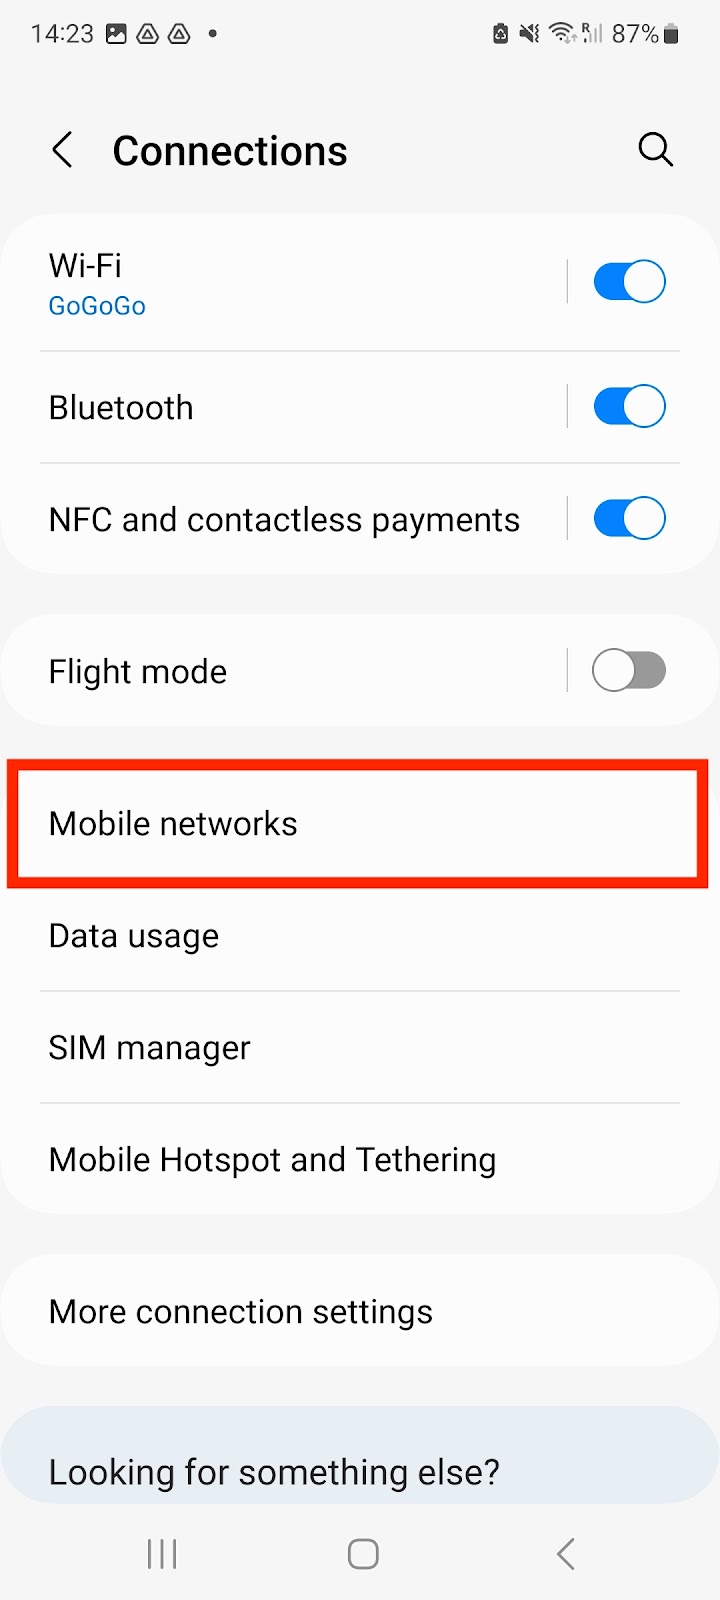
-
Ensure that "Data Roaming" is Enabled/ON. If your Data Roaming has a "blue toggle bar" then it is enabled. Note: Your eSIM will not work without you having "Data Roaming" enabled.
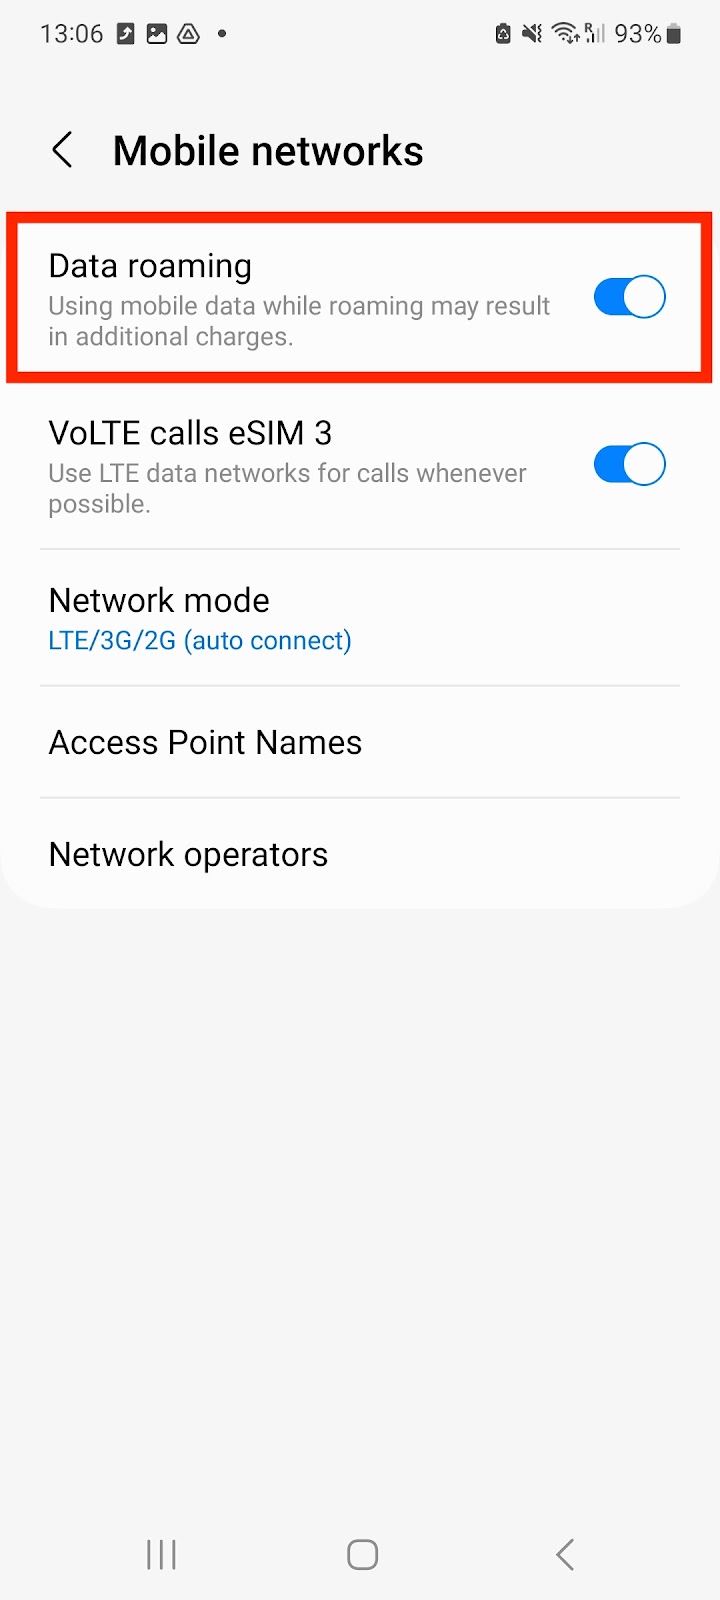
Step 2. Activate International Roaming
When the network access is successful but there is no network connection, please check and manually set the APN
-
Go into Settings > Connections

-
Click Mobile Networks and Activate Data Roaming.
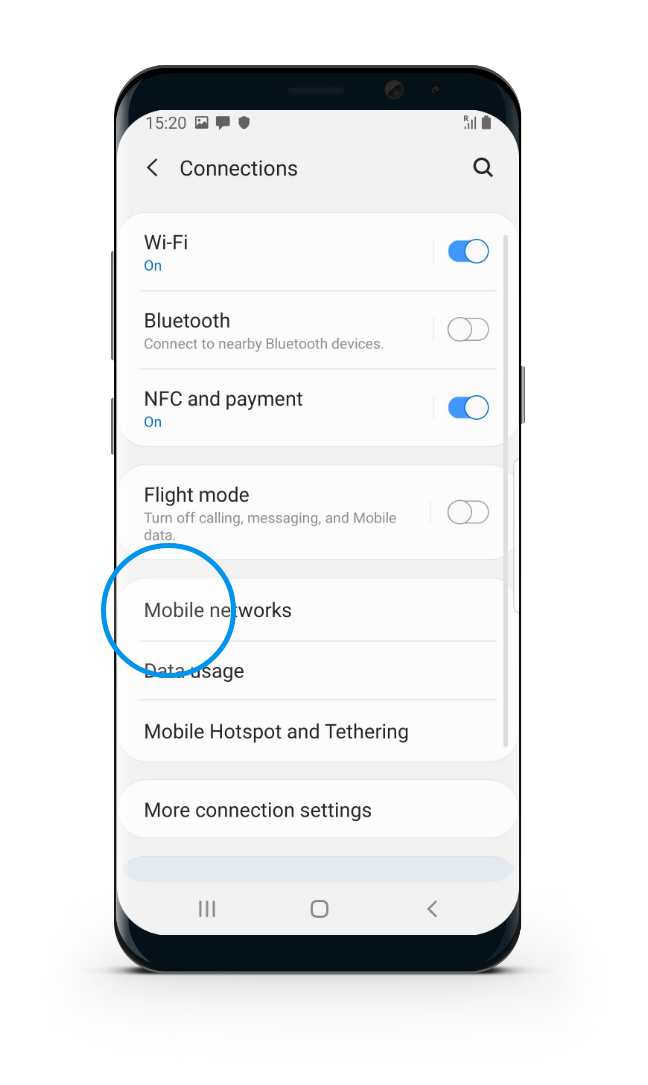
Other considerations
If you have signal but no data please check your APN settings.
Reminder: Data Roaming MUST be "ON" in order for the eSIM to work.
Step 1.Install eSIM
-
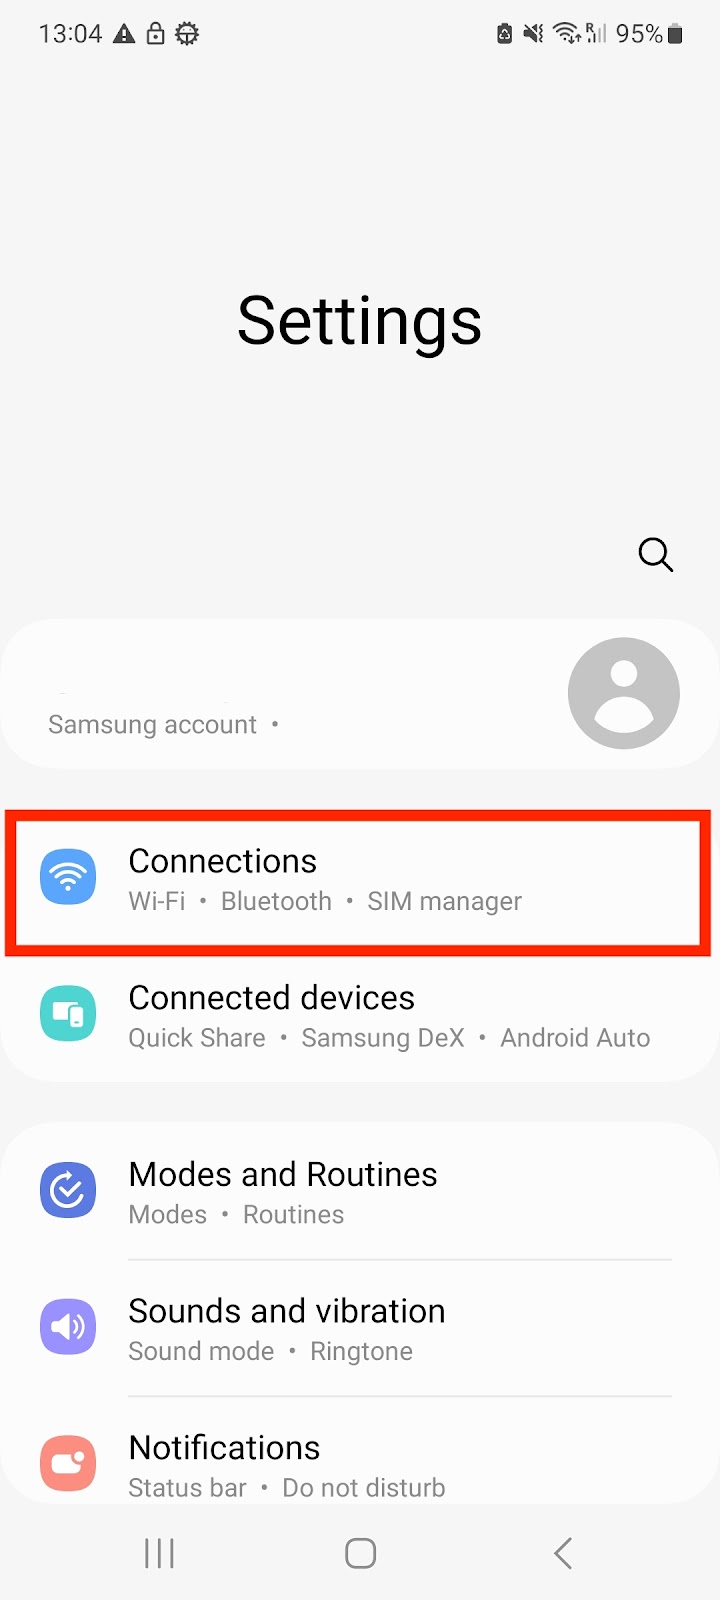
Go into Settings > Connections
-
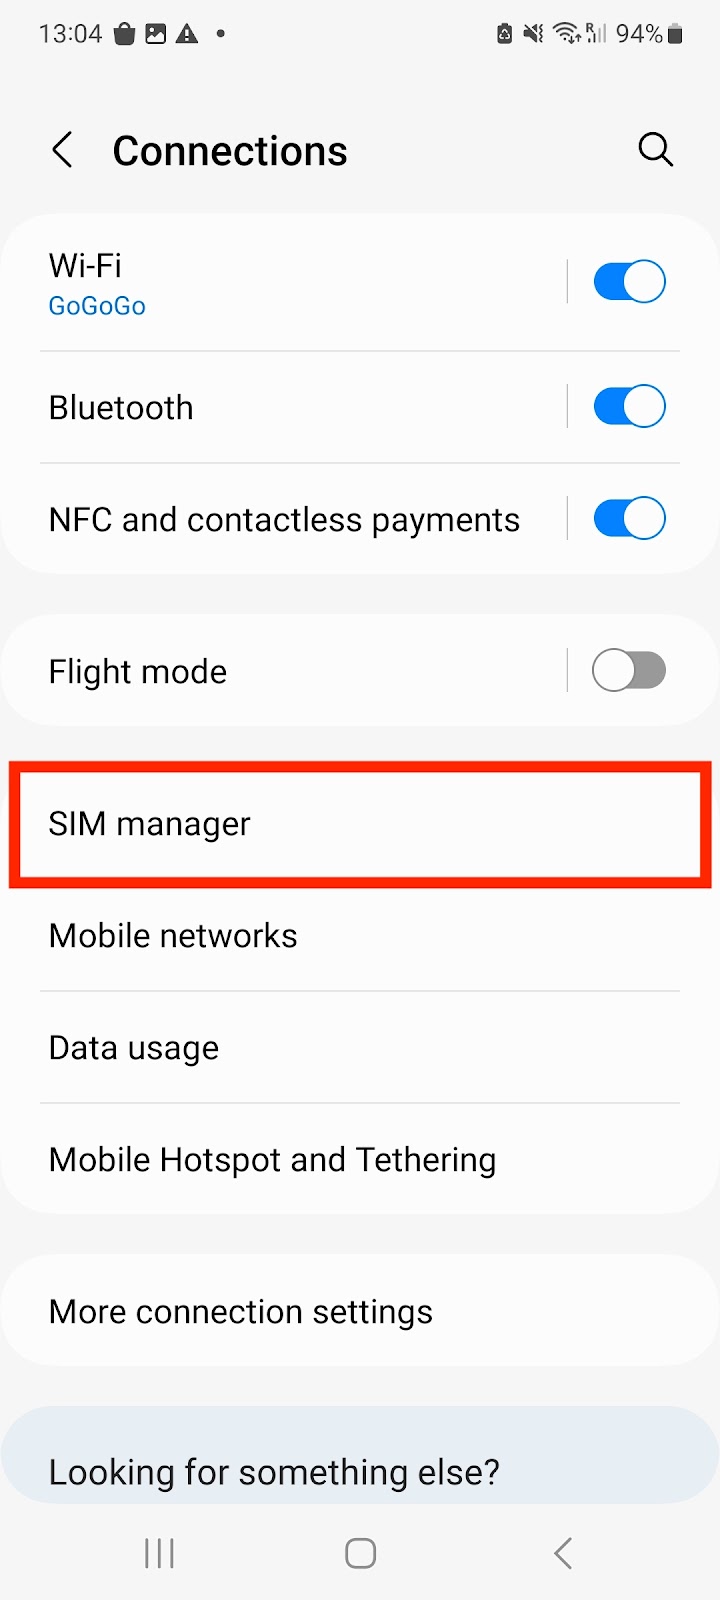
Tap Sim Manager
-
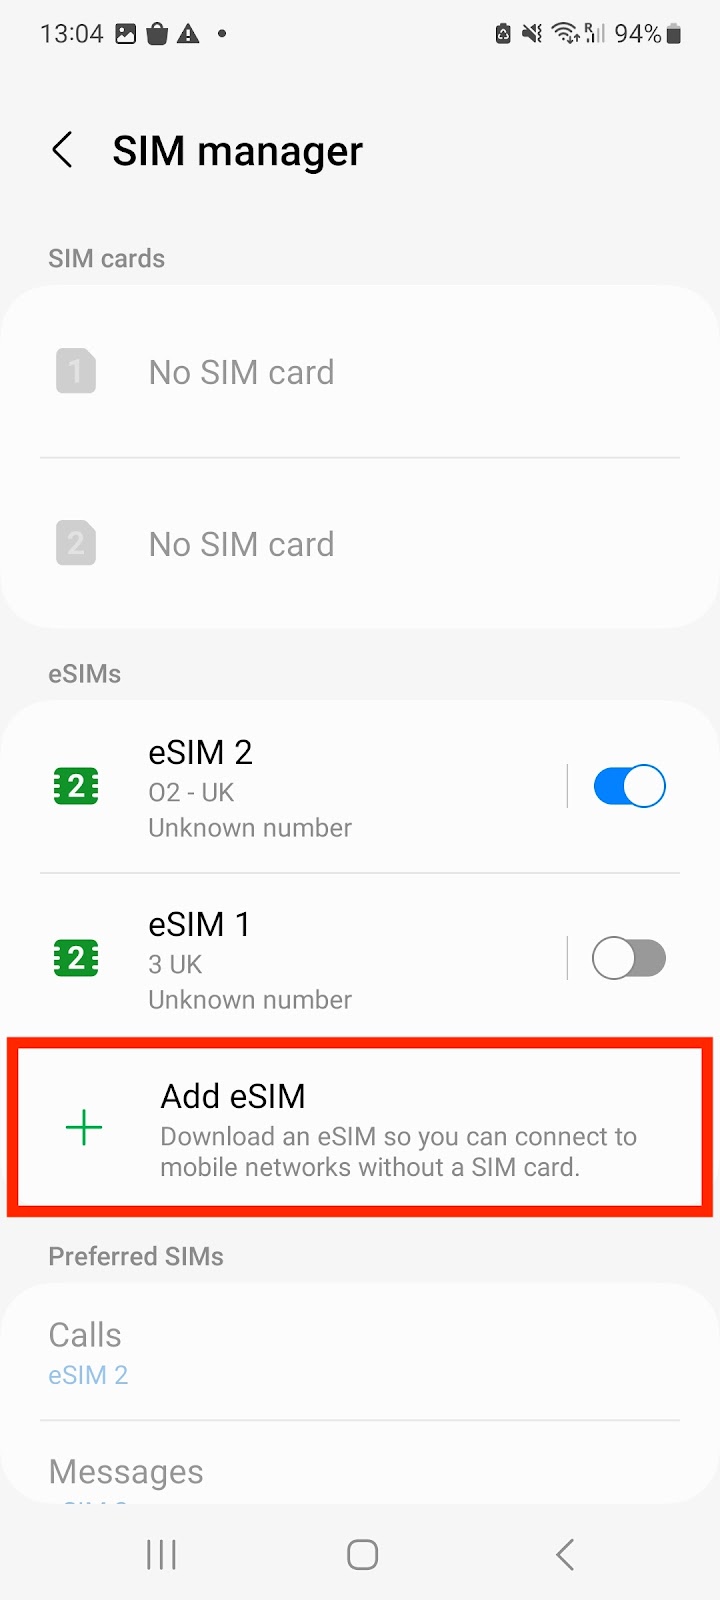
Tap Add eSIM
-
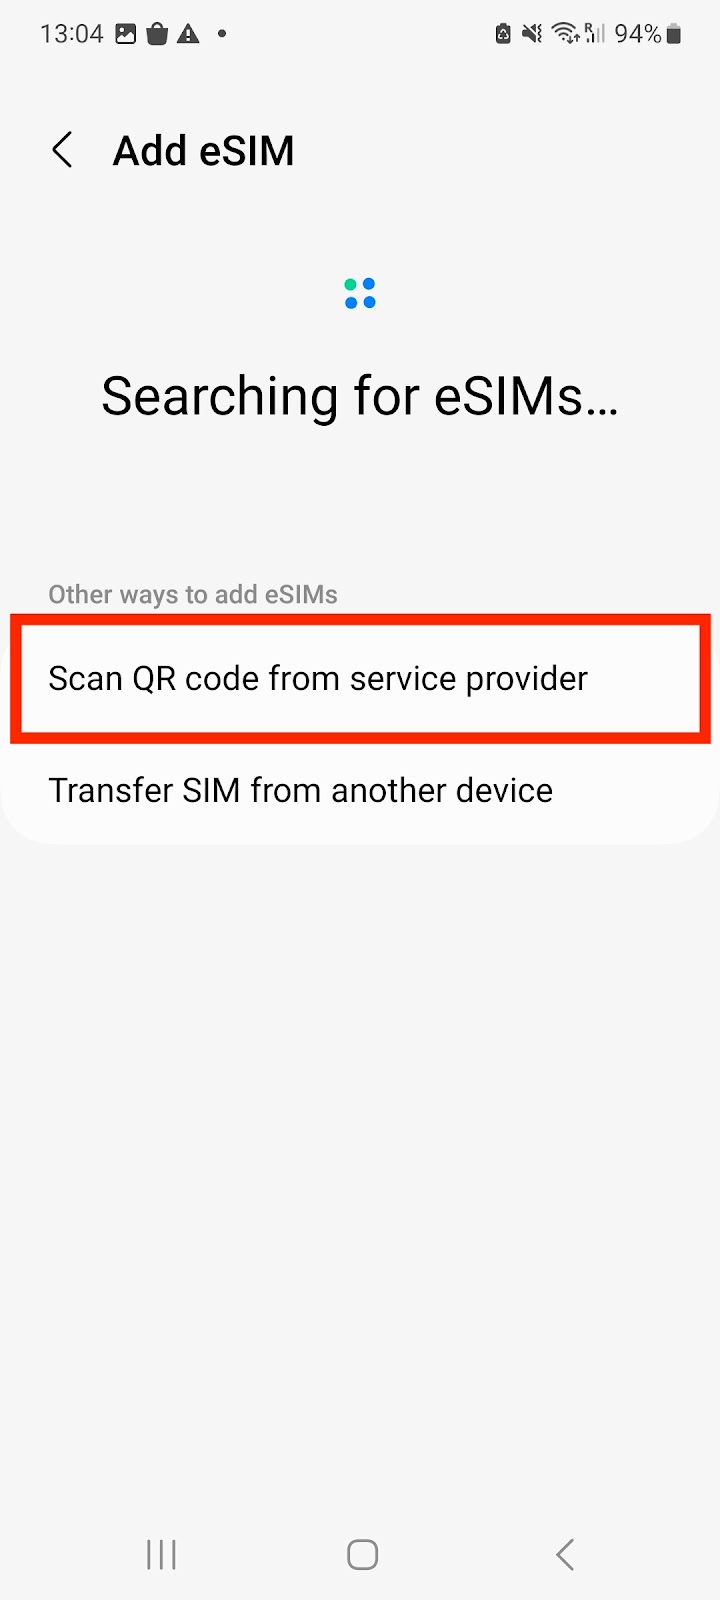
Select the option Scan QR code from service provider
-
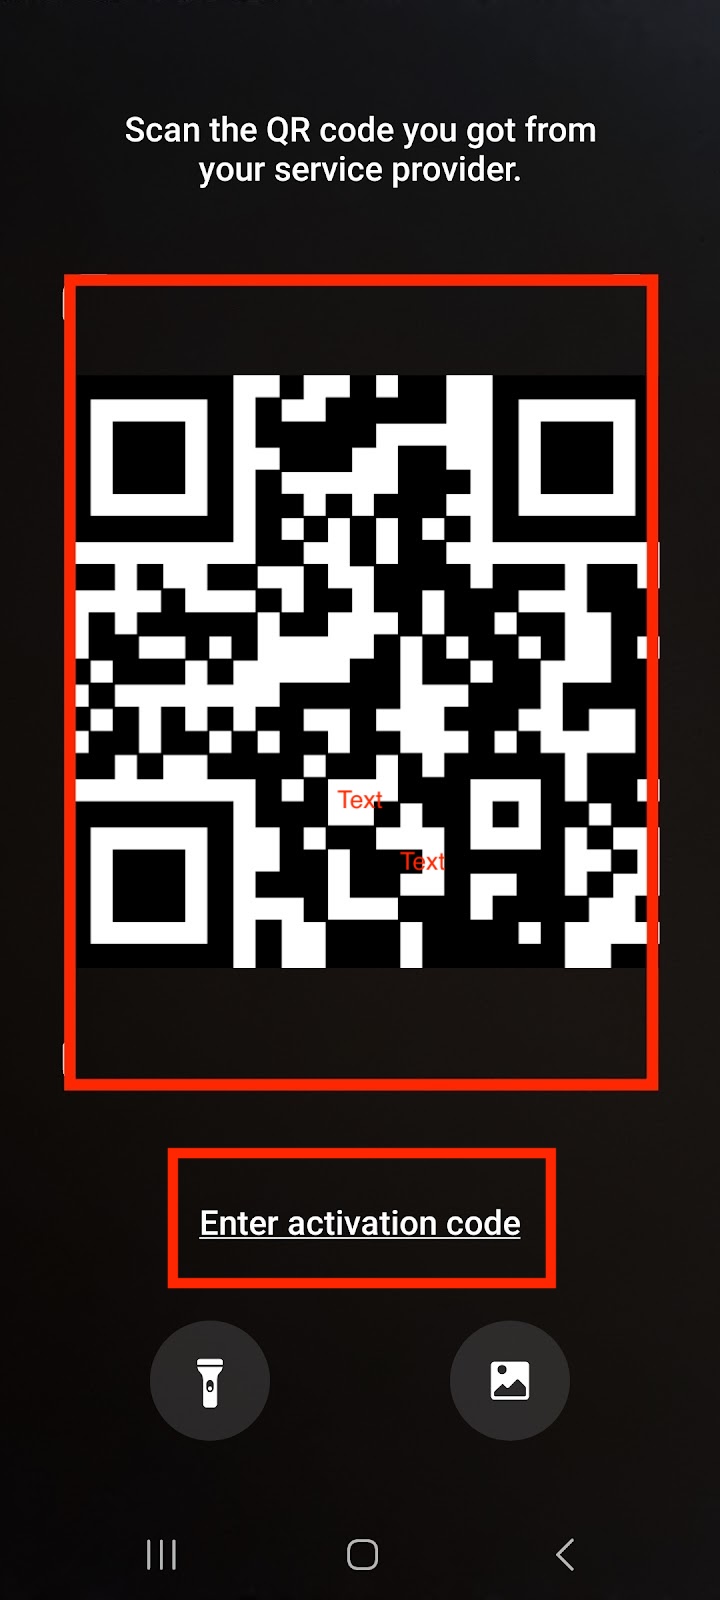
Click "Enter Activation Code"
-
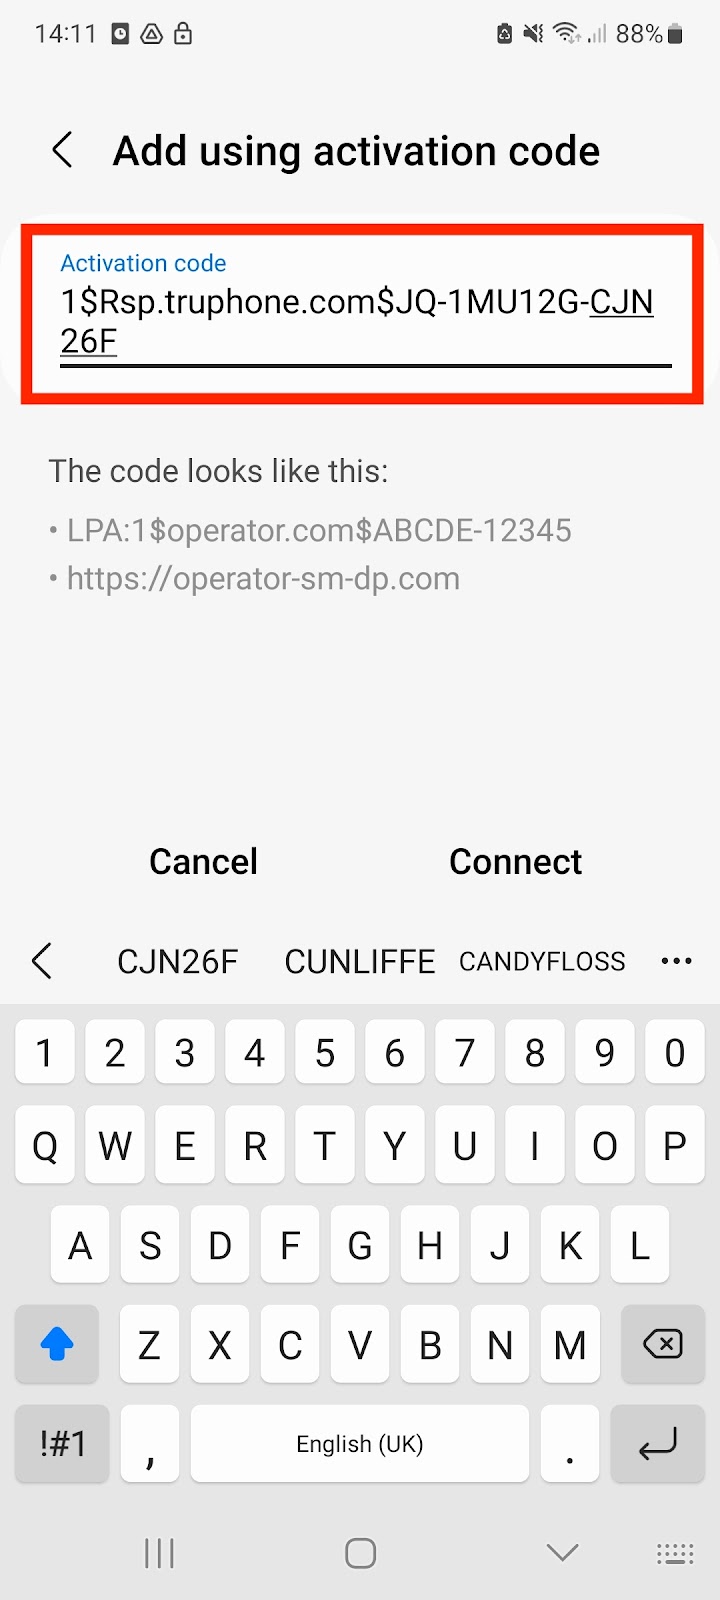
To be able to Manually install the eSIM, you will need your "SM-DP + Address" and "Activation code". You must enter in the format of "1$Insert SM-DP + address here$ followed by the activation code, eg JQ-1MU12G-CJN26F. The code should end up looking something similar to the photo below.
-
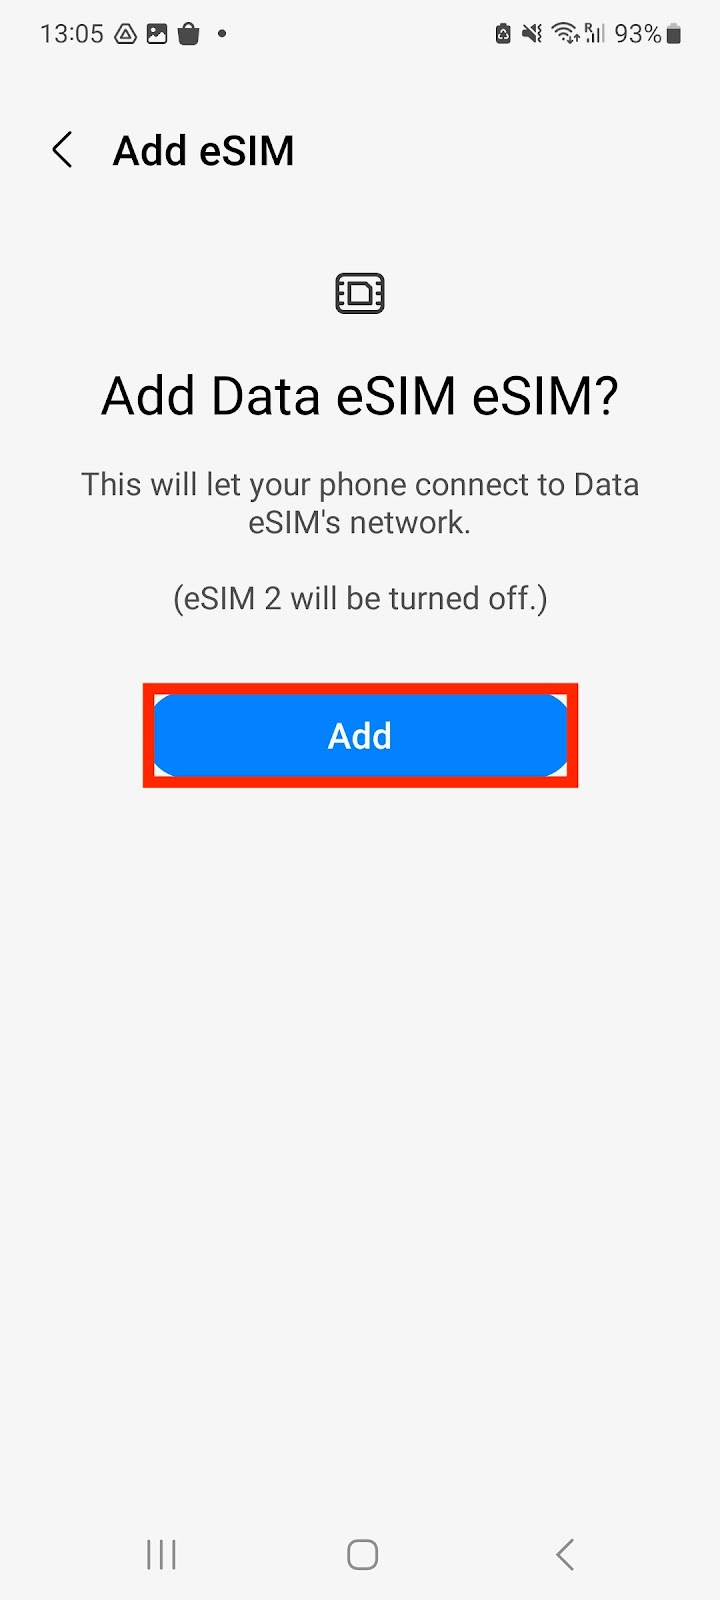
Click "add" and it will enable the installation process.
-
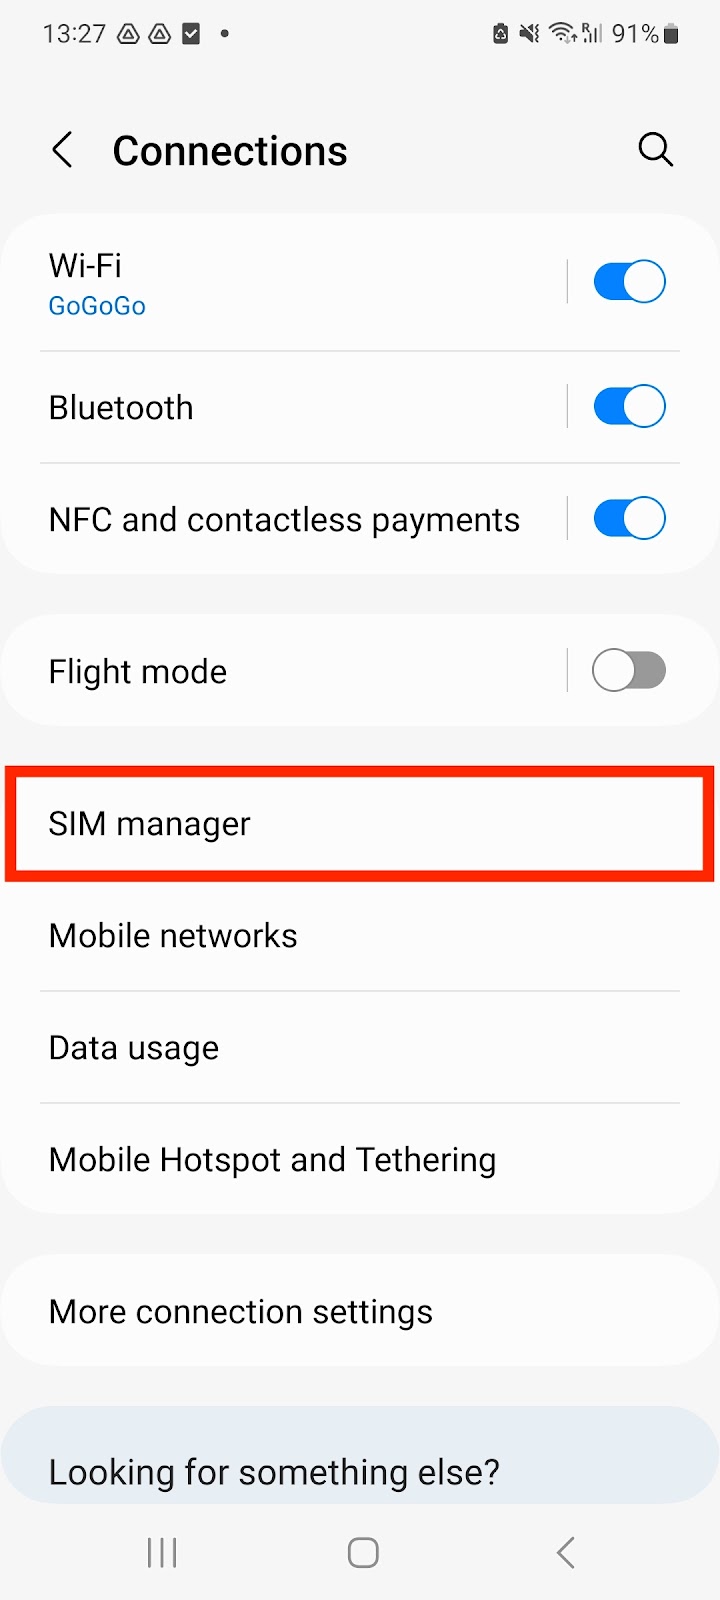
Once this has been completed, go back into "Connections" >
-
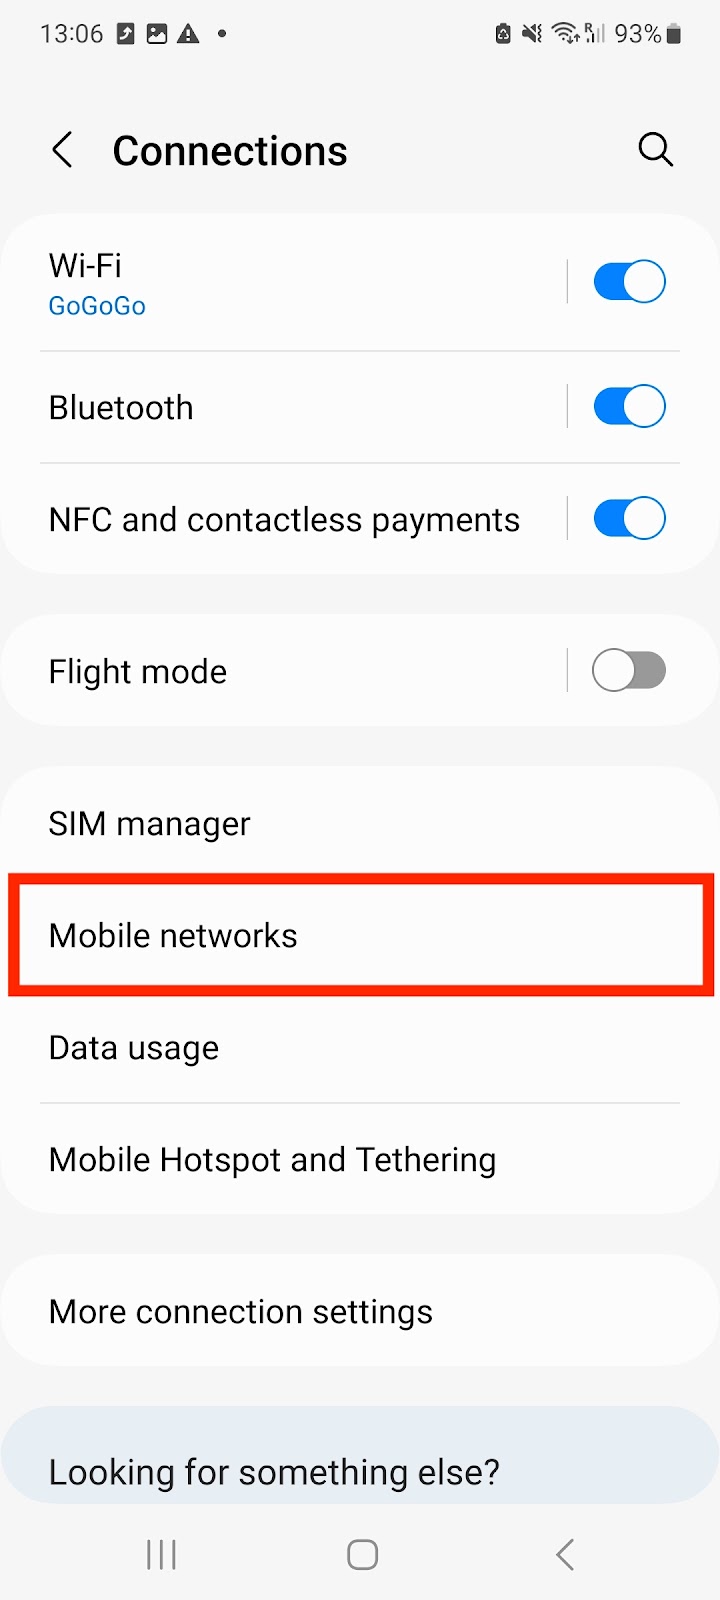
Tap "Mobile Networks"
-
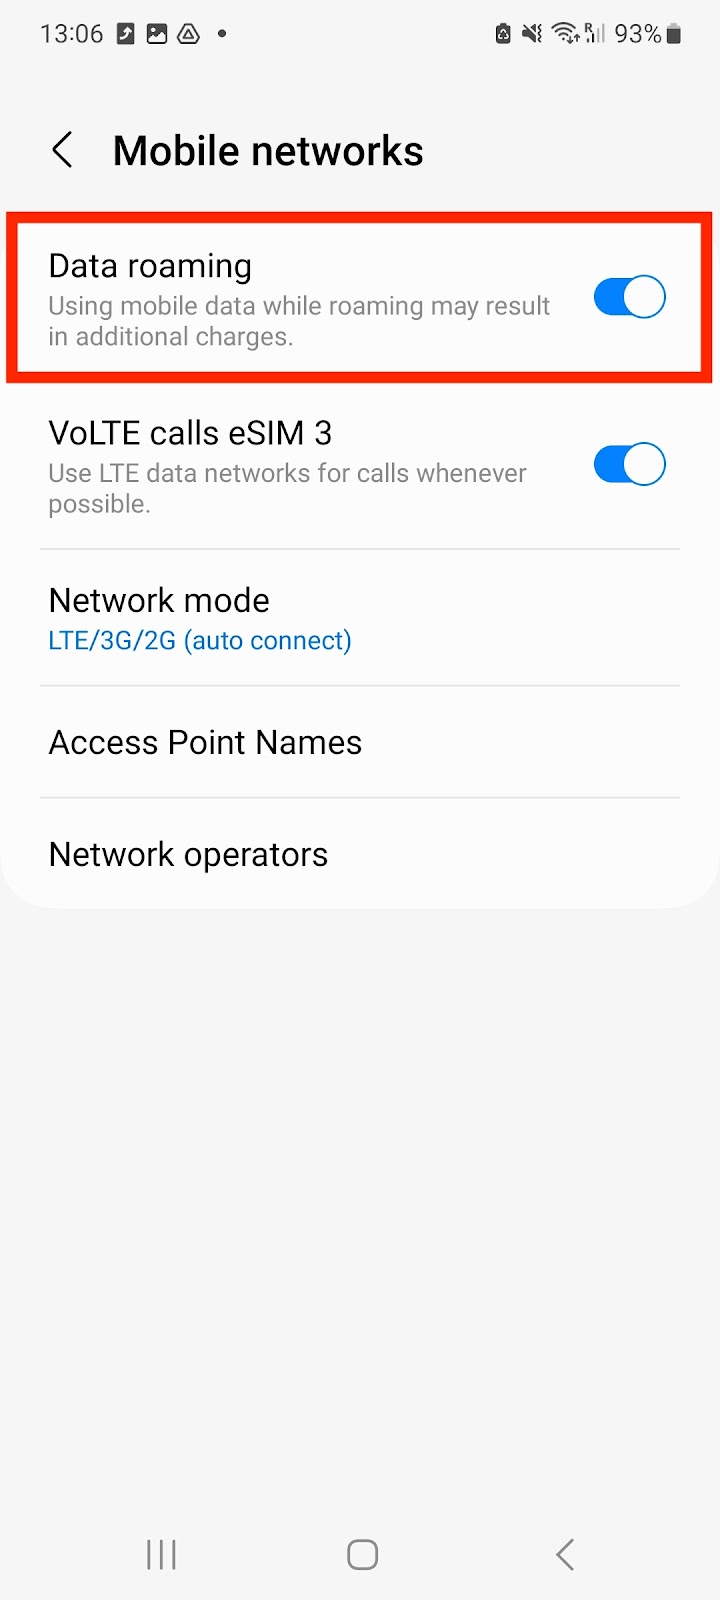
Ensure that "Data Roaming" is Enabled/ON. If your Data Roaming has a "blue toggle bar" then it is enabled. Note: Your eSIM will not work without you having "Data Roaming" enabled.
Step 2. Activate International Roaming
When the network access is successful but there is no network connection, please check and manually set the APN
-
Go into Settings > Connections

-
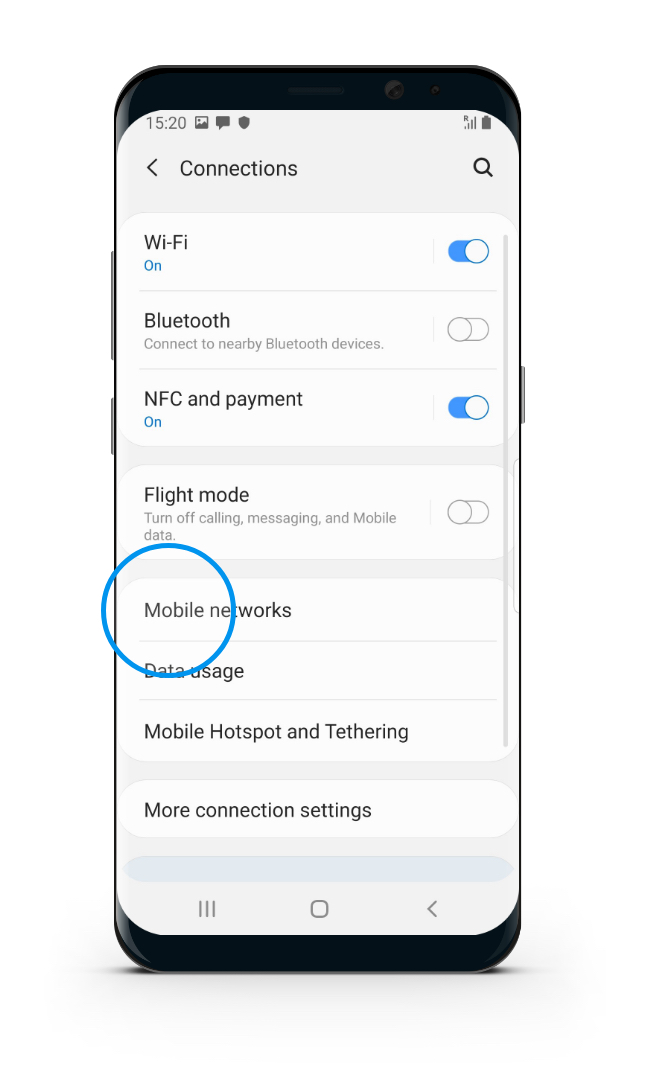
Click Mobile Networks
-
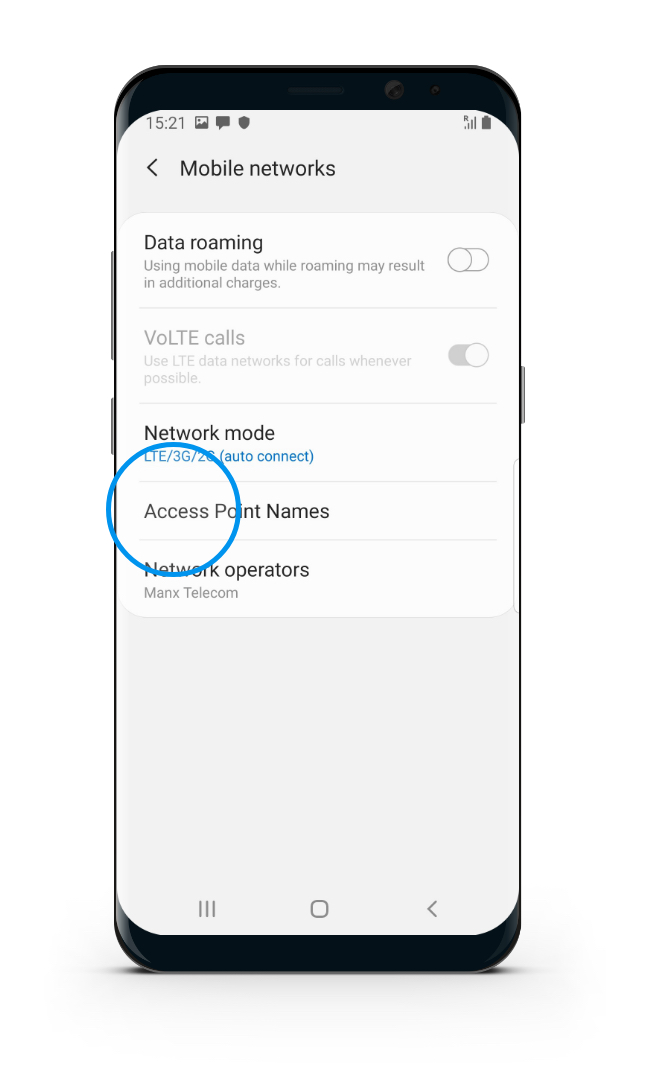
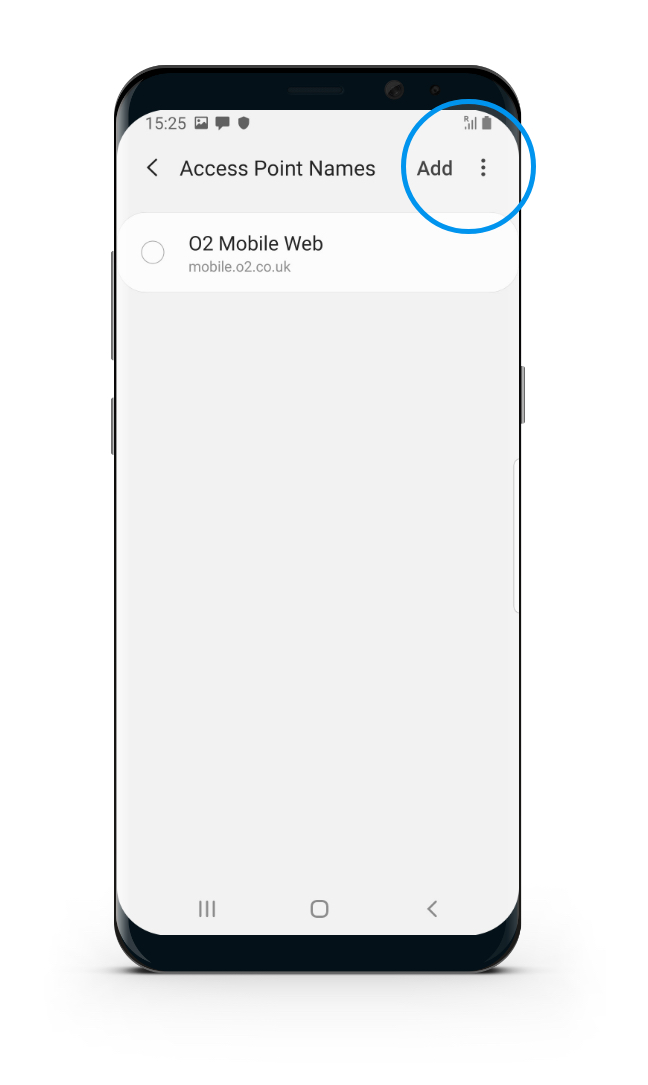
Click Access Point Name (APN)
-
Click on three dots on the right corner
-
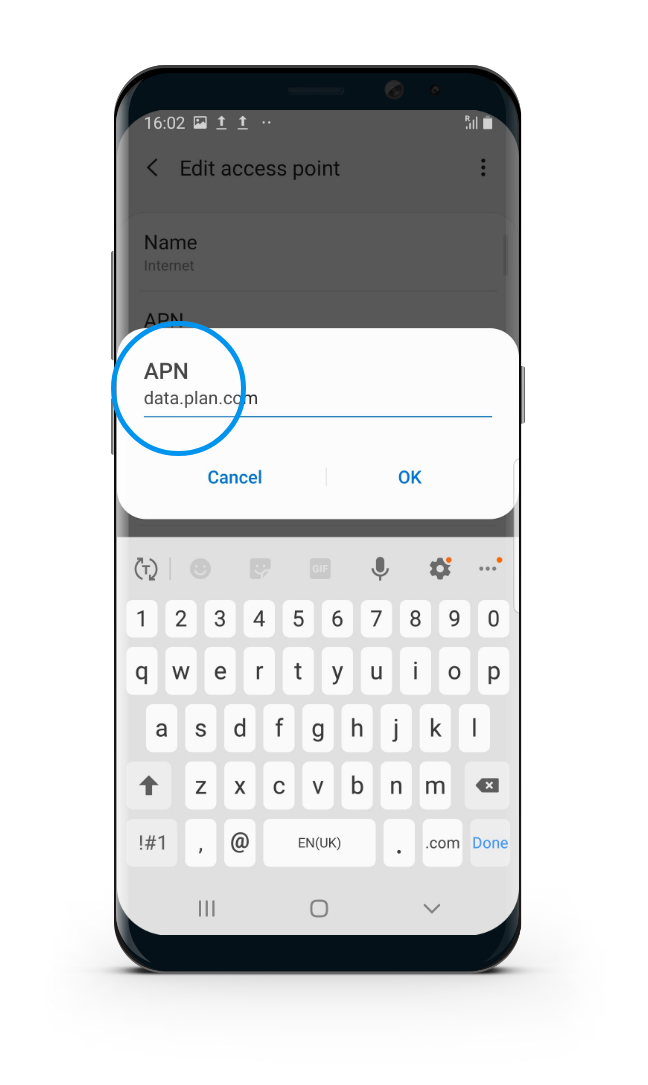
You will see the APN name
Other considerations
If you have signal but no data please check your APN settings.
Reminder: Data Roaming MUST be "ON" in order for the eSIM to work.


